
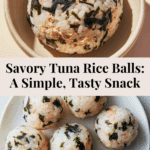
Easy Tuna Rice Balls Recipe
Looking for a delicious snack or quick lunch idea that’s both satisfying and beyond easy to throw together? Enter Easy Tuna Rice Balls, a recipe that brings together creamy tuna, fragrant sesame, toasty seaweed, and the unbeatable comfort of sticky sushi rice—all in one irresistible bite! Whether you’re new to Japanese-inspired dishes or you make onigiri weekly, these little flavor-packed rice balls will become your newest obsession.
Ingredients You’ll Need
Easy Tuna Rice Balls come together with just a handful of pantry staples, yet each ingredient plays a starring role in the final dish. Every item brings its unique flavor, texture, or visual appeal, turning simple kitchen basics into pure magic.
- Sushi rice: Gives the rice balls their classic chewiness and helps everything hold together. Make sure it’s freshly cooked and slightly cooled for the best texture.
- Canned tuna: Brings protein-rich, savory goodness. Opt for tuna in water or brine and drain well before mixing.
- Sesame oil: Adds a nutty, aromatic depth that wakes up all the flavors.
- Japanese mayonnaise (Kewpie style): Lends a creamy tartness that makes the filling extra luscious. Add more to taste if you like things rich!
- Roasted seaweed (nori): Infuses a salty, ocean-kissed crunch, and brings classic onigiri flavors. Tear or crumble it for easy mixing and colorful flecks.
How to Make Easy Tuna Rice Balls
Step 1: Combine Your Ingredients
Find your biggest mixing bowl and pile in the sushi rice, sesame oil, creamy Kewpie mayonnaise, drained tuna, and your hand-torn roasted seaweed. Mix everything thoroughly—the aim is a beautifully sticky, slightly creamy mixture with savory tuna and pops of seaweed in every bite. If it feels a bit dry, just sneak in another spoonful of mayo. No shame in chasing creaminess!
Step 2: Divide Into Portions
Once your mixture is uniform, press it gently into a flat layer in the bowl. Got a spatula? Perfect. Use it to “cut” your rice mixture pizza-style into eight triangular portions. Don’t stress about perfect sizes—just aim for reasonably even handfuls. This part couldn’t be simpler, and you truly can eyeball it if you’re feeling confident.
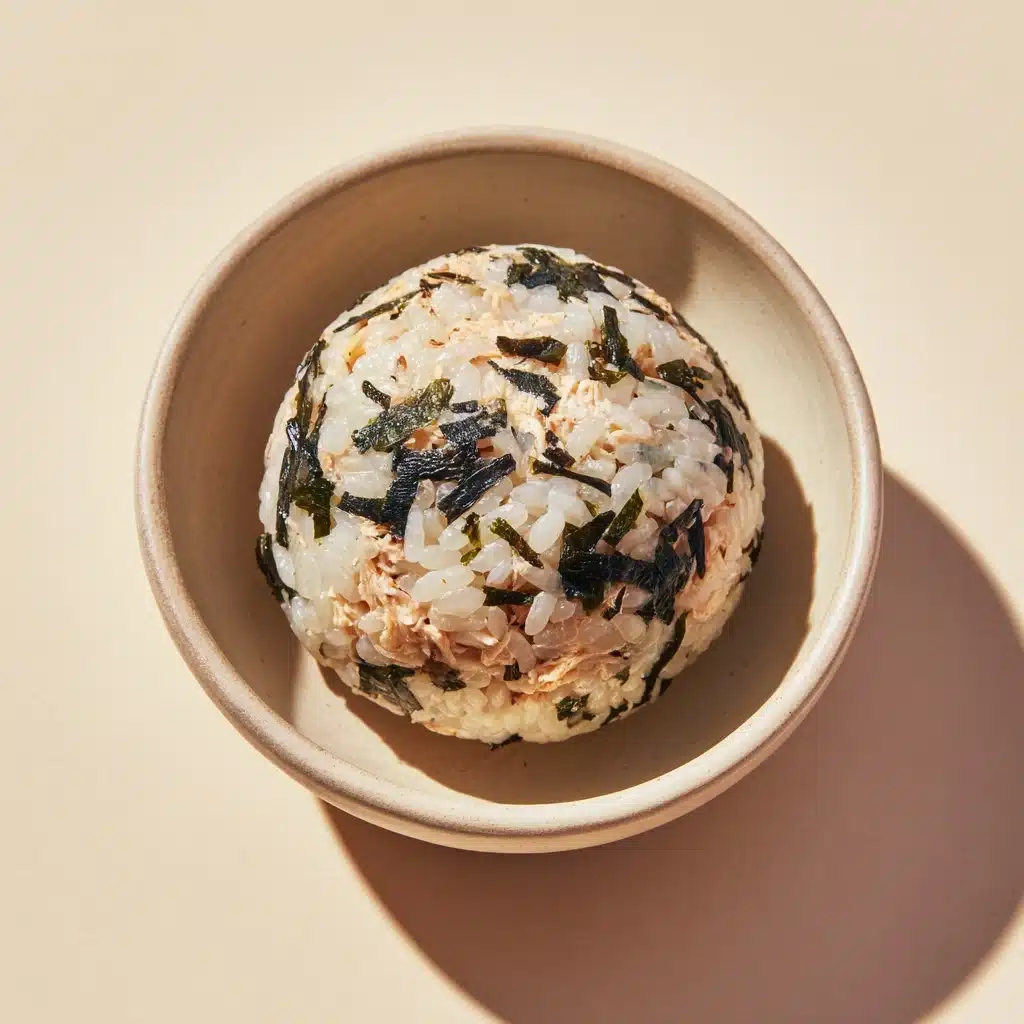
Step 3: Shape Your Rice Balls
With freshly washed hands or food-safe gloves, scoop up each portion and roll it between your palms into a compact ball. Don’t be shy—press firmly to make sure each one holds its shape, but don’t crush them! Repeat for each section, and marvel at how easy it is to create your own Easy Tuna Rice Balls.
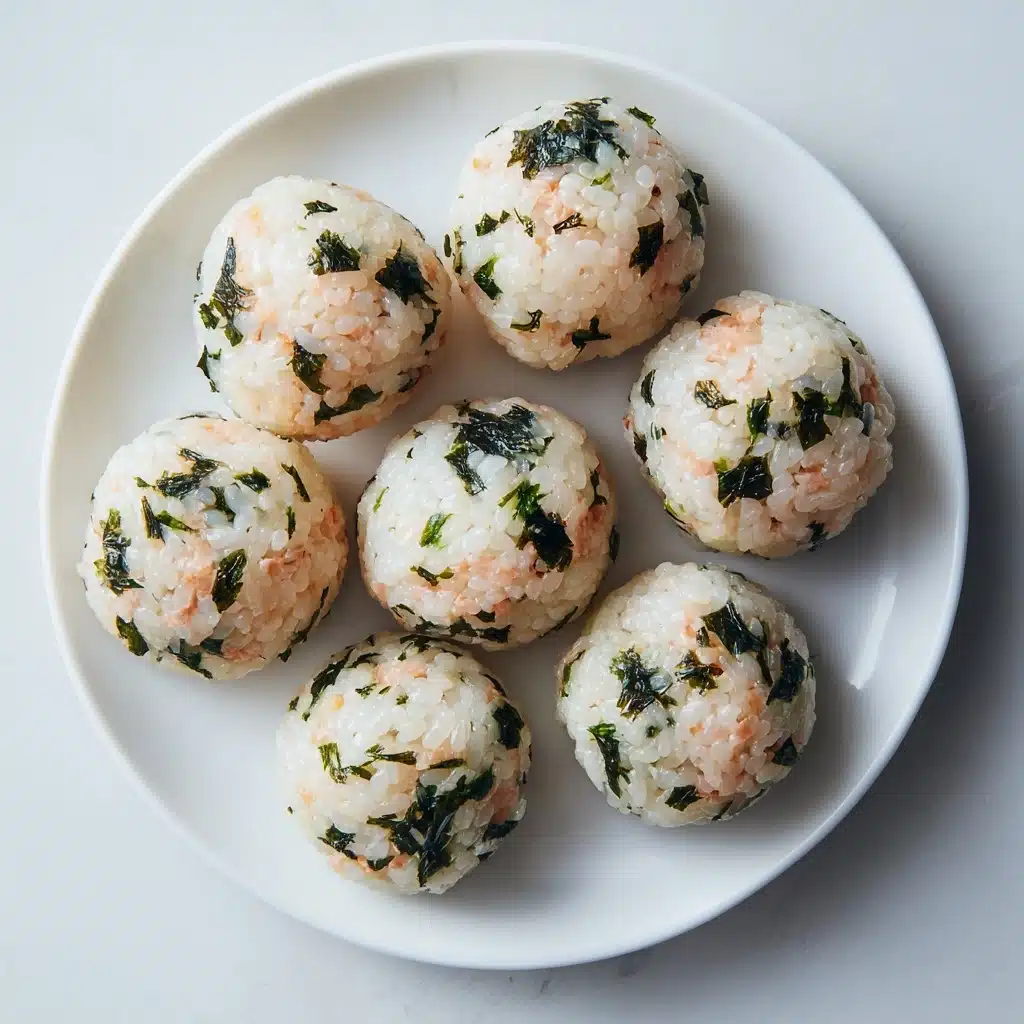
Step 4: Serve and Enjoy
Arrange your finished rice balls on a platter and serve right away for the freshest flavor and best texture. The creamy tuna, nutty sesame, and seaweed all come together in the most satisfying bite—perfect for lunchboxes, snack plates, or picnics!
How to Serve Easy Tuna Rice Balls
Garnishes
Add some extra flair with your favorite garnishes! Sprinkle furikake, toasted sesame seeds, or a fresh herb like chives over the top for a hit of color, crunch, and flavor. A dab of wasabi or drizzle of soy sauce on the side lets everyone customize their own bite.
Side Dishes
Pair your Easy Tuna Rice Balls with a bowl of miso soup, crisp pickled vegetables, or a fresh green salad for a balanced meal. A little cup of edamame or sliced cucumbers also make excellent sides, cooling the palate and rounding out the plate.
Creative Ways to Present
For fun presentation, arrange the rice balls in bento boxes with colorful veggies—think radish roses, carrot sticks, or mini tomatoes. You can even wrap each ball with a strip of nori for a handheld, onigiri-style treat, or skewer them for a playful party platter.
Make Ahead and Storage
Storing Leftovers
If you have extra Easy Tuna Rice Balls, pop them in an airtight container and refrigerate. They’ll stay tasty for up to two days, though the seaweed may soften over time—still delicious!
Freezing
You can freeze rice balls, but expect a slight change in texture. Wrap each one tightly in plastic wrap, then place in a freezer-safe bag. Freeze for up to one month and thaw overnight in the fridge for best results.
Reheating
Easy Tuna Rice Balls are best enjoyed at room temperature or slightly chilled, but if you prefer them warmed, microwave for about 10–15 seconds (just to take the chill off). Avoid overheating to keep the rice moist and tender.
FAQs
Can I use regular rice instead of sushi rice?
Sushi rice is sticky enough to hold everything together, so it’s definitely preferred. If using regular rice, choose a short-grain variety and make sure it’s cooked until slightly sticky for good results.
Is there a vegetarian version of Easy Tuna Rice Balls?
Absolutely! Swap out tuna for chopped avocado, mashed chickpeas, or cooked, seasoned tofu for a tasty vegetarian alternative. The basic method stays exactly the same!
What can I do if my mixture is too dry?
Simply add another spoonful of Japanese mayo or a splash more sesame oil until you reach a creamy, cohesive texture that’s easy to shape. This is one recipe where taste-testing is always encouraged!
Can I pack these in a lunchbox?
Yes, Easy Tuna Rice Balls are perfect for meal prep! Just wrap each one individually or place them in a tightly sealed bento box with an ice pack. They’re great for school, work, or on-the-go snacking.
How can I add extra flavor?
Try mixing in a pinch of wasabi, finely chopped scallions, sriracha, or a few drops of soy sauce into the mixture for an extra kick. Your taste buds will thank you!
Final Thoughts
If you’re searching for a quick and reliable recipe to add to your meal rotation, Easy Tuna Rice Balls are pure joy every time. Gather your ingredients, give them a try, and see just how simple and tasty homemade Japanese-inspired snacks can be. I’d love to hear how you make them your own!
PrintEasy Tuna Rice Balls Recipe
These Easy Tuna Rice Balls are a delightful and simple dish that combines the flavors of sushi rice, canned tuna, and seaweed, all bound together with creamy Japanese mayonnaise.
- Prep Time: 15 minutes
- Cook Time: 0 minutes
- Total Time: 15 minutes
- Yield: 8 rice balls 1x
- Category: Appetizer
- Method: Mixing, Shaping
- Cuisine: Japanese
- Diet: Gluten Free
Ingredients
Rice Mixture:
- 2 cups prepared sushi rice
- 1 tablespoon sesame oil
- 2–3 tablespoons Japanese mayonnaise (Kewpie style)
Filling:
- 150 grams canned tuna
- 1 to 1½ cups torn roasted seaweed
Instructions
- Step 1: Combine Ingredients
In a large bowl, add the rice, sesame oil, mayonnaise, tuna, and seaweed. Mix all the ingredients thoroughly until everything is well combined. If the mixture seems dry or lacks creaminess, add more mayo to achieve the desired consistency. - Step 2: Shape the Mixture
Press the mixture down in the bowl, creating a flat surface. Use a spatula to ‘cut’ the rice mixture into 8 triangular portions, similar to slicing a pizza. For a more intuitive approach, estimate the amount of rice mixture needed for each ball, without precisely measuring each portion. - Step 3: Form the Rice Balls
With clean hands or while wearing gloves, scoop up each portion and gently roll it into a ball. Make sure each rice ball is tightly packed to hold its shape. Once all portions are formed into balls, they are ready to serve. - Step 4: Serve and Enjoy
Serve the rice balls immediately for the best texture and flavor. Enjoy this simple yet satisfying dish on its own or alongside your favorite accompaniments.
Nutrition
- Serving Size: 1 rice ball
- Calories: 140
- Sugar: 1g
- Sodium: 250mg
- Fat: 4g
- Saturated Fat: 1g
- Unsaturated Fat: 3g
- Trans Fat: 0g
- Carbohydrates: 22g
- Fiber: 1g
- Protein: 4g
- Cholesterol: 5mg
Keywords: Tuna Rice Balls, Japanese, Easy Recipe, Appetizer


