
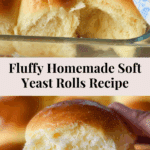
Old Fashioned Soft Yeast Rolls Recipe
There’s something endlessly comforting about the aroma of Old Fashioned Soft Yeast Rolls wafting through your kitchen. Tender, pillowy, and just sweet enough, these golden beauties are the definition of “baked from scratch” magic. Whether you’re making Sunday dinner extra special, hosting a holiday feast, or just craving real homemade bread, these rolls deliver every time with their delicate, melt-in-your-mouth texture and irresistible buttery finish.
Ingredients You’ll Need
The magic of this recipe lies in the simplicity of each component; no extravagance here—just pure, essential elements working together for maximum flavor and softness. Each ingredient has a role in creating the color, structure, and flavor that make Old Fashioned Soft Yeast Rolls so memorable.
- Eggs (room temperature): Add richness and help give the rolls their characteristic soft and fluffy structure.
- Milk: Enriches the dough and keeps the rolls velvety and tender—whole or 2% is best for flavor.
- Water (room temperature): Helps hydrate the dough and gives it just the right consistency.
- Vegetable oil (or melted butter): Adds moisture and keeps the crumb extra soft; butter brings an extra layer of flavor if you’re feeling indulgent.
- Sugar: Not just for sweetness—sugar helps feed the yeast and gives the rolls that golden hue.
- Salt: Balances flavors and strengthens the dough structure for a perfect rise.
- All-purpose flour: The backbone of these rolls—it’s sturdy enough to hold up yet soft enough for that classic, tender bite.
- Instant yeast: The “lift” behind it all—this yeast means you don’t need a separate proofing step, making things easier and faster.
- Melted butter: For brushing—gives rolls their glossy, irresistible finish and another hit of buttery goodness.
How to Make Old Fashioned Soft Yeast Rolls
Step 1: Mix and Knead the Dough
Start by gathering all your ingredients—you’ll be amazed at how quick this comes together. In a large bowl, combine the eggs, milk, water, oil (or melted butter), sugar, salt, flour, and instant yeast. You can knead by hand, let your stand mixer handle it, or use a bread machine set on the “dough” cycle. Knead until the dough is smooth and elastic; aim for that magical “windowpane” stage, where a piece stretches thin without tearing but you can see the light through it. If things feel too dry, add a splash more milk, a little at a time.
Step 2: First Rise
Once your dough is smooth, shape it into a ball and nestle it in a clean, lightly oiled bowl. Cover with plastic wrap or a damp tea towel; let the dough hang out in a warm spot for about an hour, or until doubled in size. This is when the yeast really works its magic, developing airy texture and a subtle, nutty flavor.
Step 3: Divide and Shape
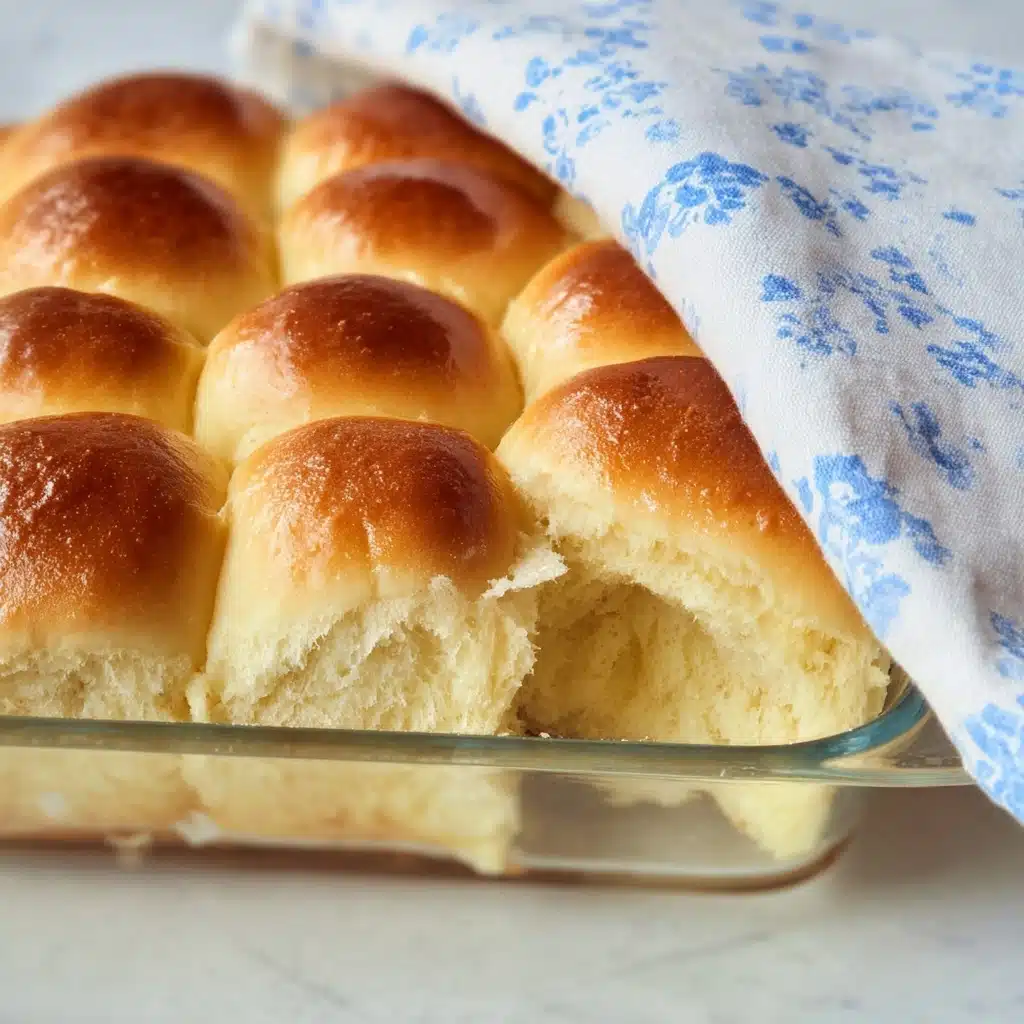
Gently turn your risen dough onto a clean countertop—flour it lightly if needed. Using a sharp knife, cut it into 24 equal pieces. The next step transforms each piece into a perfect little ball: pull and pinch the bottoms together, so the tops are silky-smooth. Arrange them snugly in a 13×9-inch baking dish that you’ve greased well, so they bake up soft and connected.
Step 4: The Second Rise
Time for another rest so those rolls puff up beautifully! Cover the dish with greased plastic wrap and let the dough proof in a cozy, draft-free spot for about 45 minutes. By the end, your rolls should look tippy-top round and puffy. While they rise, preheat your oven to 350°F (175°C) so you’re ready to bake.
Step 5: Bake and Butter
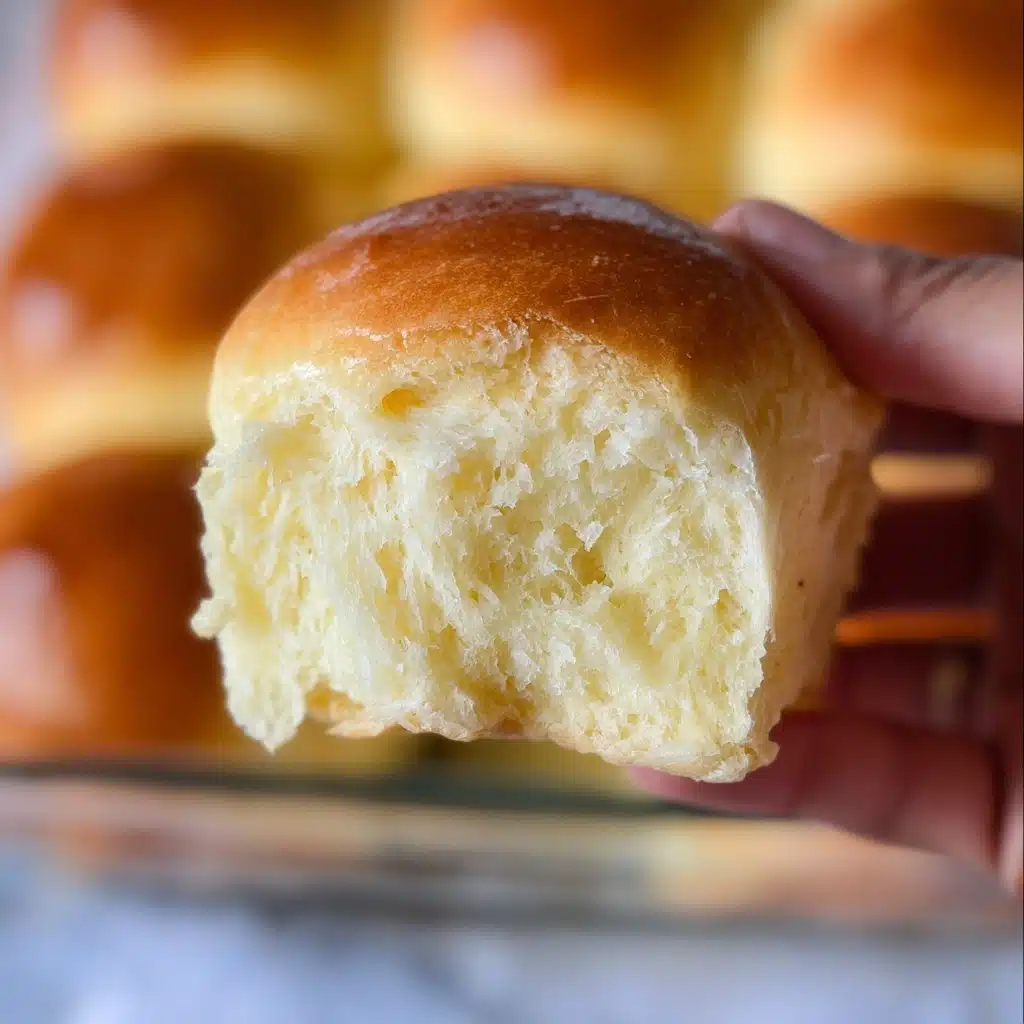
As soon as the rolls are ready, remove the plastic. Brush each one with generous melted butter—this helps them bake up golden and keeps the tops wonderfully tender. Pop the dish into the oven for 18–20 minutes, until the rolls are deeply golden and smell absolutely incredible. Right after baking, while still warm, brush the tops with that last bit of melted butter for maximum gloss and flavor.
Step 6: Cool and Serve
Give the rolls about 20 minutes to cool, just so they set up and you don’t burn your fingertips in the rush to tear one apart. Serve right out of the baking pan for that cozy, rustic touch, or gently transfer them to a platter if you like a prettier presentation. Either way, these Old Fashioned Soft Yeast Rolls are ready for absolute enjoyment.
How to Serve Old Fashioned Soft Yeast Rolls
Garnishes
These rolls don’t need much fuss—they’re incredible with just a bit of extra melted butter brushed on top and a sprinkling of flaky sea salt. For something fancier, try a dusting of fresh chopped herbs like parsley or chives, or a drizzle of honey for a touch of sweetness.
Side Dishes
Old Fashioned Soft Yeast Rolls are the ultimate sidekick to just about any meal. They soak up gravy at Thanksgiving, complete a roast chicken dinner, or star alongside a hearty stew or chili. For a brunch twist, serve them warm with homemade jam and a platter of sliced ham or smoked salmon.
Creative Ways to Present
Hosting a party? Turn these rolls into mini sandwiches, stuffed with pulled pork, egg salad, or whatever filling your heart desires. You can arrange them pull-apart style on a pretty wooden board, or tuck them into a lined basket for that bakery feel. Old Fashioned Soft Yeast Rolls are always a conversation starter when plated with a swirl of whipped honey butter.
Make Ahead and Storage
Storing Leftovers
Keep any leftover Old Fashioned Soft Yeast Rolls in an airtight container or zip-top bag at room temperature for up to two days. If you want them to stay ultra-soft, you can add a slice of bread in with them—which helps keep the moisture just right.
Freezing
To enjoy these rolls beyond baking day, let them cool completely, then pop them into a freezer-safe bag or container. Freeze for up to three months. When you’re ready for that fresh-baked magic, thaw at room temperature in the bag for a few hours until soft again.
Reheating
Nothing beats a warm, just-baked roll! To reheat, wrap a few rolls in foil and place in a 300°F (150°C) oven for about 10 minutes. For a quick fix, you can also zap individual rolls in the microwave for 10–15 seconds, preferably with a damp paper towel to hold in the moisture.
FAQs
Can I use active dry yeast instead of instant yeast?
Absolutely! Just dissolve the active dry yeast in a bit of the warm milk with a pinch of sugar and let it foam for 5–10 minutes before mixing into the dough. You’ll get the same fluffy results.
What if I don’t have a stand mixer?
No worries at all—you can easily knead by hand. It just takes a little extra elbow grease and about 8–10 minutes to get that smooth, elastic dough, but the final results will be just as tender and delicious.
Can I make Old Fashioned Soft Yeast Rolls ahead of time?
Definitely! Prepare the dough and let it rise, then shape into rolls and place in your baking dish. Cover tightly and stash in the fridge overnight. The next day, let them come to room temperature and proof fully before baking as usual.
Why aren’t my rolls as fluffy as expected?
Density in bread can come from under-kneading, expired yeast, or too little rising time. Make sure your yeast is fresh, knead the dough until it passes the windowpane test, and give those rises the time they need for pillowy perfection.
Can I swap out the milk for a non-dairy alternative?
You sure can. Use an unsweetened non-dairy milk like almond, soy, or oat—the rolls will still come out soft and delicious, though the flavor might be slightly different.
Final Thoughts
Baking Old Fashioned Soft Yeast Rolls is like bringing a bit of vintage comfort to your table. The warmth, the aroma, the way family and friends swoon after that first bite—it’s pure joy. Treat yourself to a batch soon and experience what homemade rolls are all about!
PrintOld Fashioned Soft Yeast Rolls Recipe
These Old Fashioned Soft Yeast Rolls are a classic favorite that pairs perfectly with any meal. Soft, fluffy, and slightly sweet, these rolls are sure to be a hit at your table.
- Prep Time: 20 minutes
- Cook Time: 20 minutes
- Total Time: 2 hours 30 minutes
- Yield: 24 rolls 1x
- Category: Bread
- Method: Baking
- Cuisine: American
- Diet: Vegetarian
Ingredients
Dough:
- 2 eggs (room temperature)
- ¾ cup milk
- ¼ cup water (room temperature)
- ¼ cup vegetable oil (or melted butter)
- ¼ cup sugar
- 1 ½ teaspoons salt
- 4 cups all-purpose flour
- 1 tablespoon instant yeast
For brushing:
- 3 tablespoons melted butter
Instructions
- Knead the dough: Combine eggs, milk, water, vegetable oil (or melted butter), sugar, salt, flour, and instant yeast in a big bowl. Knead the dough by hand, with a stand mixer using the dough hook attachment, or with a bread machine set to the ‘dough’ cycle. If the dough seems dry or dense, add a bit more milk. The dough is kneaded enough when you can stretch a small piece thin enough to see light through it without tearing (windowpane test).
- The first rise: Shape the dough into a ball and place it in a clean, lightly oiled bowl. Cover with plastic wrap or a damp tea towel. Allow to rise in a warm place for 1 hour or until doubled in size.
- Divide and shape: Turn the dough out onto a clean surface. Divide it into 24 equal pieces using a sharp knife. Shape each piece into a ball by pinching the bottoms until the tops are smooth. Spray a 13 x 9 glass baking dish with nonstick spray and place the dough balls inside.
- The second rise: Cover the dish with greased plastic wrap and set it in a warm place to rise until very puffy, for about 45 minutes. Preheat the oven to 350°F (175°C) towards the end of the rising time.
- Bake: Remove the plastic wrap and brush the rolls with 2 tablespoons of melted butter. Bake for 18-20 minutes, until golden brown. Brush with the remaining 1 tablespoon of melted butter while still warm.
- Serve: Let the rolls cool for about 20 minutes. Serve directly from the pan or transfer to a serving dish.
Notes
- For best results, use room temperature ingredients for optimal yeast activation.
- You can freeze the unbaked rolls after shaping. Thaw and allow to rise before baking.
Nutrition
- Serving Size: 1 roll
- Calories: 150
- Sugar: 3g
- Sodium: 200mg
- Fat: 5g
- Saturated Fat: 2g
- Unsaturated Fat: 3g
- Trans Fat: 0g
- Carbohydrates: 23g
- Fiber: 1g
- Protein: 4g
- Cholesterol: 30mg
Keywords: Old Fashioned Soft Yeast Rolls, Dinner Rolls, Bread Recipes


