
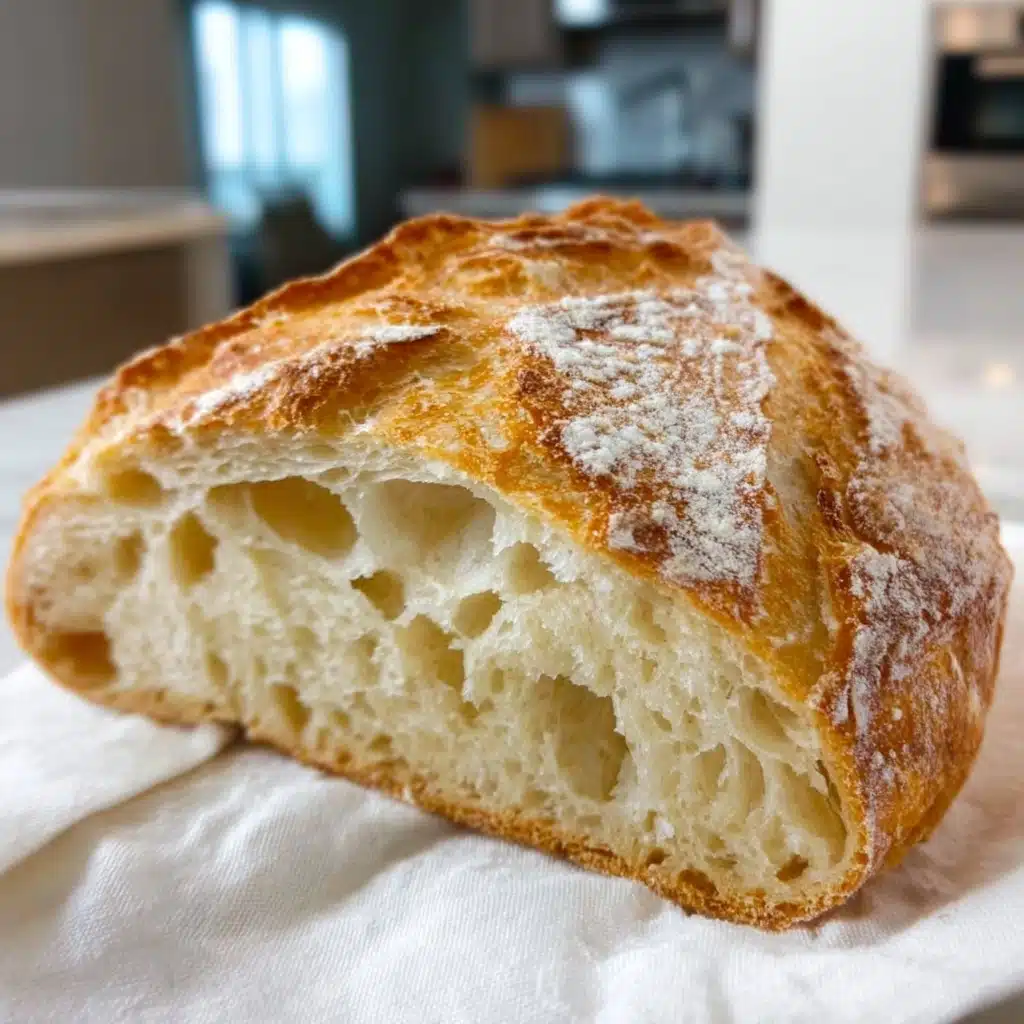
Artisan Bread Recipe
If you have ever dreamed of baking your own fresh, crusty loaf that fills your kitchen with the aromas of warm, homemade goodness, then this Artisan Bread Recipe is your new best friend. This simple recipe brings out the magic of just a handful of ingredients to create a bread with a perfectly chewy interior and a golden, crackling crust that’s nothing short of satisfying. Whether you’re a bread novice or a seasoned home baker, this Artisan Bread Recipe will quickly become your go-to for that authentic bakery-style loaf right at home.

Ingredients You’ll Need
Gathering just a few basic ingredients is all you need to make this delightful artisan bread. Each one plays an essential role in building the flavor, structure, and beautifully rustic look of the loaf.
- 3 cups (395 grams) all-purpose or bread flour: This is the foundation, providing the structure and chewiness that defines artisan bread.
- ½ tablespoon kosher salt: Not only enhances flavor but also controls yeast activity to ensure perfect fermentation.
- ¼ ounce instant or active dry yeast packet (2 ¼ teaspoons): The magic agent that gently causes your dough to rise and develop those amazing air pockets.
- 1 ½ cups warm water (105°F): Activates the yeast and hydrates the flour, helping create the stickiness essential to the loaf’s texture.
How to Make Artisan Bread Recipe
Step 1: Combine the Dry Ingredients
Start by mixing your flour, kosher salt, and yeast in a large bowl. This step ensures the salt and yeast distribute evenly throughout the flour, which is key for even rising and flavor development.
Step 2: Add Warm Water and Mix
Pour the warm water over your dry mixture and stir gently until it just comes together. Your dough will be sticky but manageable, which is exactly what we want for that tender crumb.
Step 3: Let the Dough Rise
Cover your bowl with a towel or plastic wrap and allow the dough to rise at room temperature for at least 2 hours, but preferably overnight. This slow fermentation creates those wonderful complex flavors that make artisan bread so special.
Step 4: Shape the Dough
Wet your hands to prevent sticking and gently turn the dough onto a lightly floured surface. Fold the edges into the center, forming it into a round loaf or divide it into two smaller loaves. Tucking the ends underneath helps your bread hold its shape during baking.
Step 5: Prep for Baking
Place your shaped dough on parchment paper and dust the top with a light sprinkling of flour. Score 1 to 4 shallow lines in the top with a bread knife—this gives the bread room to expand and adds a rustic touch. Let the dough rest while you preheat the oven.
Step 6: Preheat Oven and Prepare Bake Surface
Set your oven to 450°F and place a baking stone, pizza stone, Dutch oven, or iron skillet inside to heat up. This intense heat is crucial for that coveted crisp crust.
Step 7: Bake with Steam for Perfect Crust
Carefully slide the dough on the parchment onto your hot baking surface. Quickly add a cup of hot water or 5 ice cubes to the oven bottom to create steam, which helps develop a crackly crust before closing the oven door promptly.
Step 8: Bake Until Golden
Let the bread bake for 25 to 30 minutes until it turns golden brown and crusty. The smell during baking alone is an instant reward!
Step 9: Cool Before Slicing
Once baked, transfer your loaf to a rack to cool for at least half an hour. Cutting too soon can squash the beautiful crumb inside, so patience now pays off with better texture.
Step 10: Store to Maintain Crispness
Keep your bread in a paper bag rather than plastic to maintain that crispy crust you worked so hard for. This envelope allows the loaf to breathe without drying out.
How to Serve Artisan Bread Recipe
Garnishes
Artisan bread is a stunning canvas for simple garnishes that elevate its flavor. Try rubbing a halved garlic clove over the warm crust for a subtle fragrant note, or drizzle a bit of extra virgin olive oil and sprinkle flaky sea salt for a decadent touch.
Side Dishes
This bread pairs beautifully with almost anything but really shines alongside hearty soups, rich stews, and delicate cheeses. Think creamy tomato basil soup, tangy goat cheese, or a zesty olive tapenade—each one complements the depth and texture of the artisan loaf wonderfully.
Creative Ways to Present
Slice your artisan bread thick for rustic sandwiches or tear into uneven chunks and serve in a bread basket with a trio of flavored butters or herb-infused oils. For gatherings, use the bread as an edible vessel for bruschetta toppings or dip it into warm fondue for a fun twist.
Make Ahead and Storage
Storing Leftovers
If you don’t finish the entire loaf, store any leftover bread in a paper bag at room temperature. This keeps the crust crisp while preventing the crumb from becoming too dry. Avoid wrapping it tightly in plastic as this will soften the crust.
Freezing
Your Artisan Bread Recipe loaf freezes beautifully. Wrap the cooled bread tightly in plastic wrap followed by foil, then place in a freezer bag. It will keep well for up to 3 months. When ready, thaw at room temperature for best texture.
Reheating
To bring your artisan bread back to life, preheat your oven to 350°F and heat the bread directly on the oven rack for about 10 minutes. This method revives the crunchy crust and moist interior, almost like fresh from the oven.
FAQs
Can I substitute all-purpose flour with whole wheat flour?
You can substitute some or all of the all-purpose flour with whole wheat flour, but keep in mind that whole wheat will make the bread denser and slightly change the flavor. It’s best to start with a half-and-half mix and adjust as you like.
Do I need a baking stone or Dutch oven to bake this bread?
While a baking stone, pizza stone, or Dutch oven helps develop a better crust by retaining heat and moisture, you can also use a heavy-duty oven-safe skillet. The essential part is having a hot surface to bake the dough on.
Why does my dough need to be sticky?
A sticky dough may seem intimidating but is crucial for artisan bread’s characteristic open crumb and texture. Avoid adding too much extra flour and embrace the stickiness—it’s a sign that your bread will be soft and airy inside.
Can I speed up the rising time?
Yes, if you are short on time, placing the dough in a slightly warmer spot can speed up rising. However, a longer, slower rise enhances flavor and texture significantly, so overnight is best when possible.
How can I tell when the bread is done baking?
Look for a deep golden brown crust and a hollow sound when you tap the bottom of the loaf. Using a kitchen thermometer, the internal temperature should be about 200°F for perfectly baked bread.
Final Thoughts
There is something truly magical about the process and results of this Artisan Bread Recipe. It takes just a little patience and a few everyday ingredients to create bread that feels like a warm, delicious achievement. Whether you’re sharing it with family or savoring it yourself, this loaf promises to bring comfort and joy to your table. I can’t wait for you to try it and fall in love with homemade bread all over again!
PrintArtisan Bread Recipe
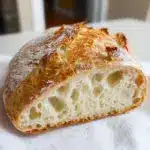
This artisan bread recipe produces a crusty, golden loaf with a soft, chewy interior. Using simple ingredients and a long fermentation process, it delivers bakery-quality bread at home with minimal effort. Perfect for sandwiches, toast, or enjoying plain with butter.
- Prep Time: 10 minutes
- Cook Time: 30 minutes
- Total Time: 2 hours 40 minutes to 10 hours 40 minutes (including rising time)
- Yield: 1 large loaf or 2 smaller loaves 1x
- Category: Bread
- Method: Baking
- Cuisine: American/European Artisan
- Diet: Vegetarian
Ingredients
Dry Ingredients
- 3 cups (395 grams) all-purpose flour or bread flour
- ½ tablespoon kosher salt
- ¼ ounce instant or active dry yeast packet (or 2 ¼ teaspoons)
Wet Ingredients
- 1 ½ cups warm water (105°F)
Instructions
- Combine Ingredients: In a large bowl, mix the flour, kosher salt, and yeast until evenly distributed.
- Add Water and Mix: Pour the warm water over the dry ingredients and stir until the dough forms a sticky but manageable mass.
- First Rise: Cover the bowl with a towel or plastic wrap and let the dough rise at room temperature for 2 to 10 hours, or preferably overnight, to develop flavor.
- Shape the Loaf: Wet your hands to prevent sticking, turn the dough onto a lightly floured surface, and gently fold the edges into the center to create a round loaf. Alternatively, divide into two smaller loaves by tucking the ends underneath.
- Rest the Dough: Transfer the shaped dough onto parchment paper, dust the top with flour, and score 1 to 4 lines on the surface with a bread knife. Let it rest for 20 to 30 minutes.
- Preheat Oven: Heat your oven to 450°F (232°C) with a baking stone, pizza stone, Dutch oven, or iron skillet inside to create a hot baking surface.
- Prepare for Baking: Slide the dough on the parchment paper onto the preheated surface. For a crustier bread, add 1 cup hot water or 5 ice cubes to the oven bottom to generate steam, then quickly close the oven door.
- Bake: Bake the bread for 25 to 30 minutes until the crust turns golden brown and crispy.
- Cool: Remove the bread and allow it to cool on a wire rack for at least 30 minutes before slicing to set the crumb structure.
- Storage: Store the cooled bread in a paper bag to maintain the crust’s crispness while preventing it from drying out.
Notes
- Using bread flour will result in a chewier texture due to higher protein content.
- A longer rise time develops a better flavor and texture, so overnight rising is recommended if possible.
- Scoring the dough controls expansion and creates an attractive crust pattern.
- Creating steam in the oven helps form a crunchy crust by keeping the surface moist during the initial baking phase.
- Letting the bread cool completely prevents a gummy texture inside.
- Store the bread in a paper bag rather than plastic to keep the crust crisp while avoiding moisture buildup.
Nutrition
- Serving Size: 1 slice (about 56 grams)
- Calories: 150
- Sugar: 0.2 grams
- Sodium: 230 milligrams
- Fat: 1 gram
- Saturated Fat: 0.2 grams
- Unsaturated Fat: 0.6 grams
- Trans Fat: 0 grams
- Carbohydrates: 31 grams
- Fiber: 1.5 grams
- Protein: 5 grams
- Cholesterol: 0 milligrams
Keywords: artisan bread, homemade bread, crusty bread, simple bread recipe, no-knead bread


