
Christmas Tie-Dye Cake Roll Recipe
Introduction
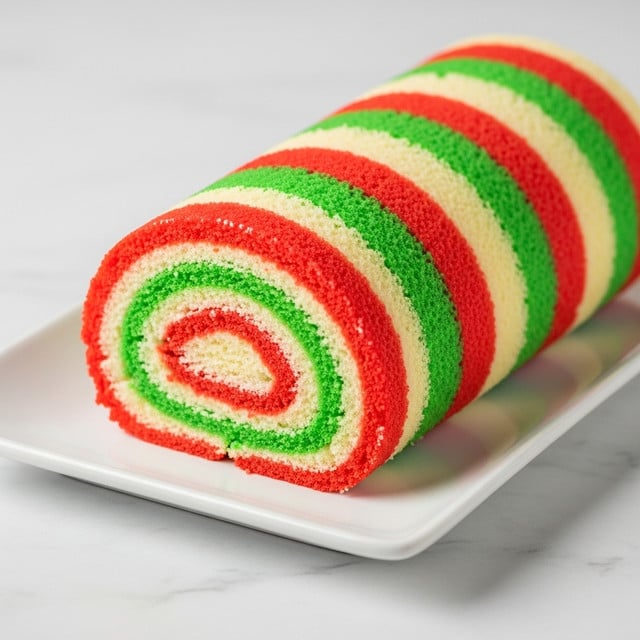
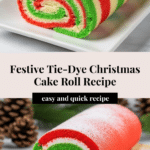
This festive Christmas Cake Roll is a delightful holiday treat featuring a colorful tie-dye pattern inside a soft, fluffy white cake. Finished with a smooth vanilla buttercream frosting, this dessert is perfect for impressing guests or adding a special touch to your holiday table.
Ingredients
- 1 white cake mix (including ingredients listed on the box)
- Red food coloring gel, as needed
- Green food coloring gel, as needed
- ½ cup butter, softened
- 1 tsp vanilla extract
- 3 cups powdered sugar
- 3-4 tbsp milk
Instructions
- Step 1: Preheat your oven to 325ºF. Grease a jelly roll pan with shortening and dust it with flour to prevent sticking. Set aside.
- Step 2: Prepare the white cake batter according to the package directions. Divide the batter evenly into two separate bowls.
- Step 3: Add red food coloring gel to one bowl and green food coloring gel to the other. Mix each until the color is evenly distributed.
- Step 4: Transfer each colored batter into separate ziplock bags and cut a small corner off each. Pipe diagonal strips of alternating colors into the prepared pan until it is filled. Use any remaining batter to fill in gaps.
- Step 5: Gently shake the pan to level the batter. Use a toothpick to swirl the batter, creating a tie-dye effect.
- Step 6: Bake for 18 minutes or until the cake is set and springs back lightly to the touch. Remove from oven and allow to cool for 20 minutes.
- Step 7: Place a clean towel on a flat surface and sprinkle it with flour. Carefully flip the cake out of the pan onto the towel. Sprinkle the top side of the cake with a little flour and cover it with another towel.
- Step 8: Starting at one end, roll the cake tightly with the towels on each side to help shape it. Set the rolled cake aside to cool completely.
- Step 9: Once cooled, gently unroll the cake. Prepare the frosting by beating softened butter and vanilla together, then gradually adding powdered sugar and milk to reach desired consistency. Spread frosting evenly over the cake surface.
- Step 10: Roll the cake again, this time using one towel to guide you. Wrap the roll tightly in the towel and place it in the freezer for 4 hours to set.
- Step 11: Remove the cake roll from the freezer, unwrap, and cut into slices. Serve chilled or at room temperature.
Tips & Variations
- Use gel food coloring for vibrant colors without thinning the batter.
- To add extra flavor, mix a teaspoon of almond or peppermint extract into the frosting.
- Swap the green color for blue or purple to create a different holiday color scheme.
- For easier rolling, let the cake cool slightly but while still warm to prevent cracking.
Storage
Wrap the cake roll tightly in plastic wrap or keep it in an airtight container. Store in the refrigerator for up to 4 days. To serve, allow it to come to room temperature or enjoy it chilled. You can freeze the cake roll for up to one month; thaw overnight in the fridge before serving.
How to Serve

Serve this delicious recipe with your favorite sides.
FAQs
Can I make this cake roll ahead of time?
Yes, this cake roll can be prepared and frozen up to a month in advance. Just be sure to thaw it in the refrigerator overnight before serving.
What if my cake cracks when rolling?
Rolling the cake while it is still slightly warm and using a floured towel to roll helps prevent cracking. If cracks appear, you can cover them with frosting once the cake is unrolled and frosted.
PrintChristmas Tie-Dye Cake Roll Recipe

This vibrant Christmas Cake Roll features a festive tie-dye pattern in red and green colors, made from a classic white cake batter. The cake is baked in a jelly roll pan, rolled with a rich vanilla buttercream frosting, and chilled for a perfect, easy-to-slice holiday dessert that serves 10 people.
- Prep Time: 30 minutes
- Cook Time: 18 minutes
- Total Time: 4 hours 48 minutes
- Yield: 10 servings 1x
- Category: Dessert
- Method: Baking
- Cuisine: American
Ingredients
Cake Batter
- 1 white cake mix (including ingredients listed on the box)
- Red food coloring gel, as needed
- Green food coloring gel, as needed
Frosting
- ½ cup butter, softened
- 1 tsp vanilla extract
- 3 cups powdered sugar
- 3–4 tbsp milk
Instructions
- Preheat and Prepare Pan: Preheat your oven to 325ºF. Grease a jelly roll pan with shortening and dust with flour to prevent sticking. Set aside for later use.
- Prepare Cake Batter: Make the white cake batter according to the package directions. Once mixed, divide the batter evenly into two separate bowls for coloring.
- Color the Batter: Add red food coloring gel to one bowl and green food coloring gel to the other. Mix each until the colors are evenly incorporated.
- Pipe the Batter: Transfer each colored batter into separate ziplock bags and cut a small corner off each. Pipe diagonal strips of alternating red and green batter into the prepared jelly roll pan until filled. Use any remaining batter to fill in gaps.
- Create Tie-Dye Pattern: Gently shake the pan to level the batter evenly. Then, use a toothpick to swirl the batter lightly to create a tie-dye effect across the cake surface.
- Bake the Cake: Bake the batter for 18 minutes or until the cake is set and springs back lightly to the touch. Remove from oven and allow to cool for 20 minutes.
- Roll the Cake: Place a clean towel on a flat surface and sprinkle it with flour. Carefully flip the cake out of the pan onto the towel. Sprinkle the top of the cake with a little flour and cover it with another towel.
- Form the Roll: Starting at one end, roll the cake tightly with the towels on each side to help shape it. Set the rolled cake aside to cool completely in this rolled form.
- Unroll and Frost: Once fully cooled, gently unroll the cake. Prepare the frosting by beating the softened butter and vanilla extract together, then gradually add powdered sugar and milk until you reach your preferred spreading consistency. Spread the frosting evenly over the cake surface.
- Re-roll and Chill: Roll the cake again, using one towel to guide a tight roll. Wrap the roll tightly in the towel and place it in the freezer for 4 hours to set and firm up.
- Serve: Remove the cake roll from the freezer, unwrap, and slice into pieces. Serve chilled or at room temperature for a festive and delicious holiday dessert.
Notes
- Make sure to grease and flour the jelly roll pan thoroughly to ensure easy removal of the cake.
- Be gentle while rolling and unrolling the cake to avoid cracks.
- The cake can be wrapped tightly in plastic wrap after freezing to maintain freshness if not served immediately.
- The amount of milk used in frosting can be adjusted for desired thickness.
- This cake is best served chilled or at room temperature for optimal flavor and texture.
Keywords: Christmas cake roll, tie dye cake, holiday dessert, jelly roll, festive cake, vanilla cake roll, colored cake batter, easy Christmas dessert

