
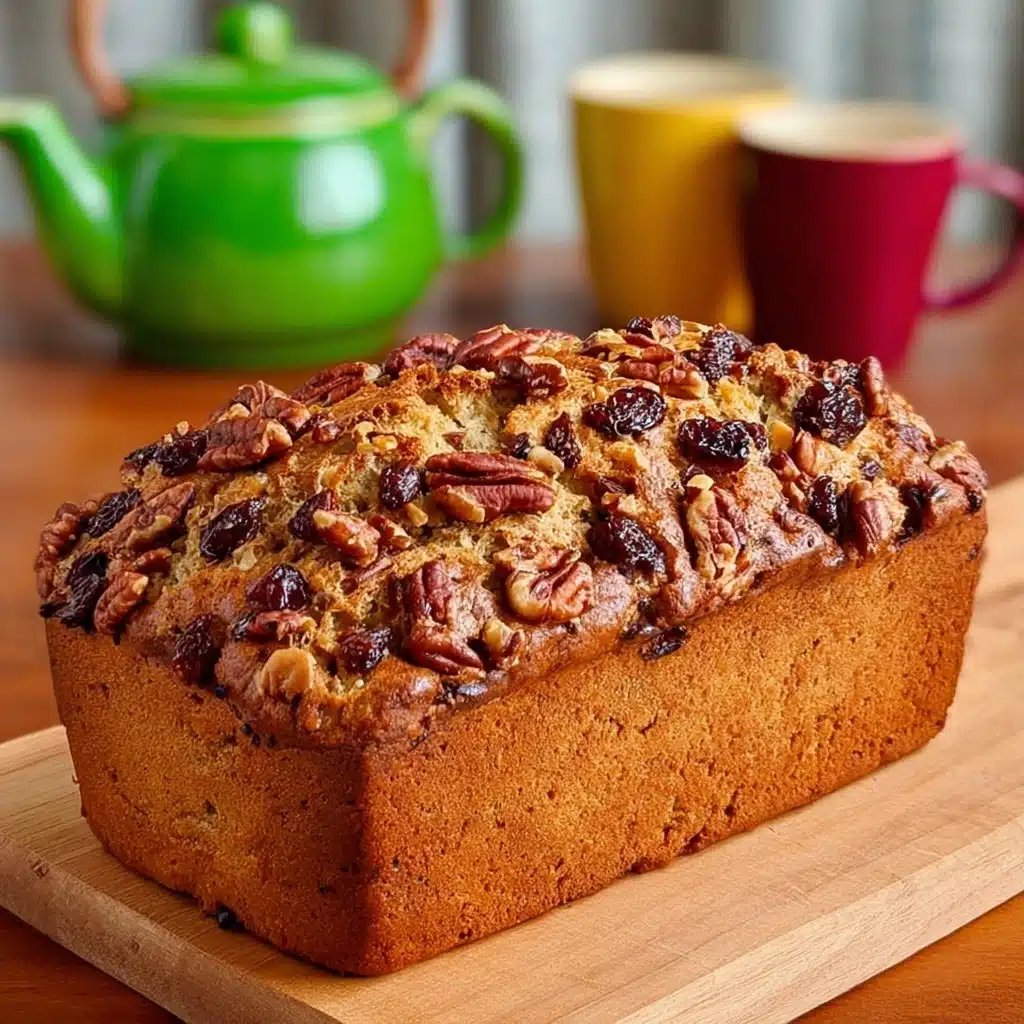
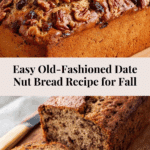
Easy Old-Fashioned Date Nut Bread Recipe
If you’re searching for a cozy, nostalgic treat that brings a comforting touch of homemade goodness to your kitchen, look no further than this Easy Old-Fashioned Date Nut Bread. Every slice bursts with the rich, natural sweetness of dates combined with the satisfying crunch of walnuts, all carried by a tender, moist crumb that’s simply irresistible. This classic recipe is perfect whether you’re serving it for breakfast, a snack, or alongside your afternoon tea—it’s a timeless favorite that never fails to warm hearts and homes.

Ingredients You’ll Need
The beauty of this Easy Old-Fashioned Date Nut Bread lies in its simplicity. Each ingredient plays a crucial role, from the sweetness and moisture dates provide to the fluffiness contributed by baking powder and the crunch from chopped walnuts, ensuring every bite is a harmonious delight.
- 1 cup chopped dates: Dates bring natural sweetness and a tender texture that’s the star of the recipe.
- 1 teaspoon baking soda: Essential for helping the dates soften and lending lightness to the bread.
- ¾ cup boiling water: This hydrates and softens the dates for a smooth batter.
- 1 egg: Adds richness and structure to the bread’s batter.
- ¾ cup light brown sugar: Provides a deep, caramel-like sweetness and helps keep the loaf moist.
- 1 teaspoon salt: Balances the sweetness and enhances the overall flavor.
- 1 teaspoon vanilla extract: Adds warmth and a lovely aromatic depth.
- 1½ cups all-purpose flour: The foundation for the loaf’s tender crumb; sifted for lightness.
- 1 teaspoon baking powder: Works alongside baking soda to ensure the bread rises perfectly.
- ¾ cup chopped walnuts: Provides a delightful crunch and nutty flavor that complements the dates beautifully.
- ¼ cup shortening, melted and cooled: Keeps the bread moist and tender without weighing it down.
How to Make Easy Old-Fashioned Date Nut Bread
Step 1: Prepare the Date Mixture
Start by combining the chopped dates with the baking soda in a small bowl. Pour boiling water over this mixture and stir well. This crucial step softens the dates and activates the baking soda, ensuring the bread will be moist and tender. Allow this mixture to cool while you prepare the rest of the batter.
Step 2: Mix the Sugar and Egg
In a mixing bowl, use an electric mixer to beat the egg until it becomes light and fluffy. Gradually add the light brown sugar to the egg, mixing well. This process incorporates air into your batter, creating a lighter texture for the bread you’ll soon enjoy.
Step 3: Combine Flavorings and Date Mixture
Next, add salt and vanilla extract to the egg and sugar mixture, stirring until fully integrated. Then, fold in the cooled date mixture carefully, making sure every bit of flavor melds together to build that signature taste of the Easy Old-Fashioned Date Nut Bread.
Step 4: Prepare the Flour and Nuts
Sift together the all-purpose flour and baking powder to evenly distribute the leavening agent, which helps the bread rise evenly. In a separate small bowl, toss the chopped walnuts with about one tablespoon of this flour mixture—this simple trick prevents the nuts from sinking to the bottom while baking.
Step 5: Combine All Ingredients and Bake
Add the floured nuts, remaining flour mixture, and the melted, cooled shortening to the date batter. Stir gently with a spoon until everything is just blended—avoid overmixing to keep the bread tender and soft. Pour the batter into a well-greased 8 1/2″ x 4 1/2″ x 2 1/2″ loaf pan and bake at 325°F for 1 to 1¼ hours. You’ll know it’s done when a toothpick inserted into the center comes out clean.
Step 6: Cool and Enjoy
Once baked, let your loaf cool on a wire rack right in the pan for the best texture. This resting time allows the bread to firm up nicely and makes slicing easier when you’re ready to dive in.
How to Serve Easy Old-Fashioned Date Nut Bread
Garnishes
Enhance your slices with simple yet delightful garnishes like a pat of creamy butter, a drizzle of honey, or a dusting of powdered sugar. These touches amplify the natural sweetness of the dates and add a lovely finish to every bite.
Side Dishes
This date nut bread pairs wonderfully with a variety of warm and cold beverages. Think steaming cups of coffee or chai tea, a glass of cold milk, or even a tangy yogurt dip for a contrast that hits all the right notes.
Creative Ways to Present
Looking to impress at a brunch or tea party? Slice the bread thinly and toast it lightly, then spread with cream cheese and top with fresh fruit or a sprinkle of chopped nuts. You could also turn it into mini sandwiches with nut butter and banana slices for a fun twist on the classic.
Make Ahead and Storage
Storing Leftovers
You can store leftover slices of Easy Old-Fashioned Date Nut Bread at room temperature in an airtight container or sealed ziploc bag for up to 3 days. This keeps the bread moist and fresh without any fuss.
Freezing
For longer storage, wrap the loaf tightly in plastic wrap, then place it inside a freezer-safe bag. It will keep beautifully frozen for up to a month. When you’re ready, thaw at room temperature for a day or warm gently in the oven.
Reheating
Reheat slices by wrapping them in foil and warming them in a 300°F oven for about 10 minutes. Or pop a slice in the toaster for a deliciously crispy outside with a soft interior—either way, it breathes new life into the bread’s flavors and texture.
FAQs
Can I substitute walnuts with other nuts?
Absolutely! Pecans or almonds work wonderfully and will give your Easy Old-Fashioned Date Nut Bread a slightly different but equally delightful crunch and flavor profile.
Is it possible to make this bread gluten free?
Yes, simply swap the all-purpose flour with a measure-for-measure gluten-free flour blend. This adjustment keeps the bread’s texture close to the original without sacrificing taste.
Can I use vegetable oil instead of shortening?
Yes, vegetable oil is a great alternative to shortening. It keeps the bread moist and tender while making the recipe a bit lighter.
How do I know when the bread is perfectly baked?
The best test is to insert a toothpick into the center. If it comes out clean or with just a few moist crumbs, your bread is ready to come out of the oven. Check after about an hour to avoid overbaking.
Can I add spices to this recipe?
Definitely! A pinch of cinnamon, nutmeg, or allspice can add wonderful warmth and complexity to the Easy Old-Fashioned Date Nut Bread without overpowering the natural date sweetness.
Final Thoughts
There’s something truly special about making and sharing Easy Old-Fashioned Date Nut Bread—a recipe that’s as comforting as it is delicious. Whether you’re new to baking or a seasoned pro, this loaf offers simple ingredients, straightforward steps, and a rewarding, buttery, nutty-sweet result that feels like a warm hug on a plate. So gather your ingredients, fire up that oven, and treat yourself and your loved ones to a little taste of timeless tradition with every slice.
PrintEasy Old-Fashioned Date Nut Bread Recipe
A classic and easy-to-make old-fashioned date nut bread featuring chopped dates and walnuts combined in a moist, sweet loaf perfect for breakfast or a snack.
- Prep Time: 20 minutes
- Cook Time: 1 hour 15 minutes
- Total Time: 1 hour 35 minutes
- Yield: 1 loaf (about 10 slices) 1x
- Category: Bread
- Method: Baking
- Cuisine: American
- Diet: Vegetarian
Ingredients
Wet Ingredients
- ¾ cup boiling water
- 1 egg
- ¾ cup light brown sugar
- 1 teaspoon vanilla extract
- ¼ cup shortening, melted and cooled
Dry Ingredients
- 1½ cups all-purpose flour
- 1 teaspoon baking powder
- 1 teaspoon baking soda
- 1 teaspoon salt
Add-Ins
- 1 cup chopped dates
- ¾ cup chopped walnuts
Instructions
- Preheat the oven: Set your oven to 325°F (165°C) to prepare for baking the bread.
- Prepare the dates: In a small bowl, mix chopped dates with baking soda. Pour boiling water over the mixture, stir well, and set aside to cool completely.
- Mix wet ingredients: In a mixing bowl, beat the egg using an electric mixer until light and fluffy. Gradually add the light brown sugar while mixing. Add salt and vanilla extract and mix well until combined.
- Combine date mixture: Stir the cooled date and baking soda mixture into the egg and sugar mixture.
- Prepare dry ingredients: Sift together the all-purpose flour and baking powder. In a small bowl, toss ¾ cup chopped walnuts with about 1 tablespoon of the flour mixture, ensuring the nuts are coated.
- Combine all ingredients: Add the floured walnuts, remaining flour mixture, and melted (but cooled) shortening to the date mixture. Stir gently with a spoon just until all ingredients are blended; avoid overmixing.
- Bake the bread: Pour the batter into a well-greased 8 1/2″ x 4 1/2″ x 2 1/2″ loaf pan. Bake at 325°F for 1 to 1¼ hours. The bread is done when a toothpick inserted into the center comes out clean.
- Cool: Remove the loaf from the oven and cool it on a wire rack while still in the pan before slicing and serving.
Notes
- To make the bread gluten free, substitute the all-purpose flour with a measure-for-measure gluten-free flour blend.
- You can replace shortening with an equal amount of vegetable oil if preferred.
- Store the bread in an airtight container or sealed zip-top bag at room temperature for up to 3 days.
- For longer storage, freeze the bread for up to one month, wrapped well to maintain freshness.
Nutrition
- Serving Size: 1 slice (about 60g)
- Calories: 236 kcal
- Sugar: 21 g
- Sodium: 332 mg
- Fat: 10 g
- Saturated Fat: 2 g
- Unsaturated Fat: 8 g
- Trans Fat: 1 g
- Carbohydrates: 36 g
- Fiber: 2 g
- Protein: 4 g
- Cholesterol: 16 mg
Keywords: date nut bread, old-fashioned bread, date bread, nut bread, homemade bread, quick bread, baking, classic recipe


