
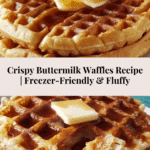
freezer-friendly Crispy Waffle Recipe with Buttermilk Recipe
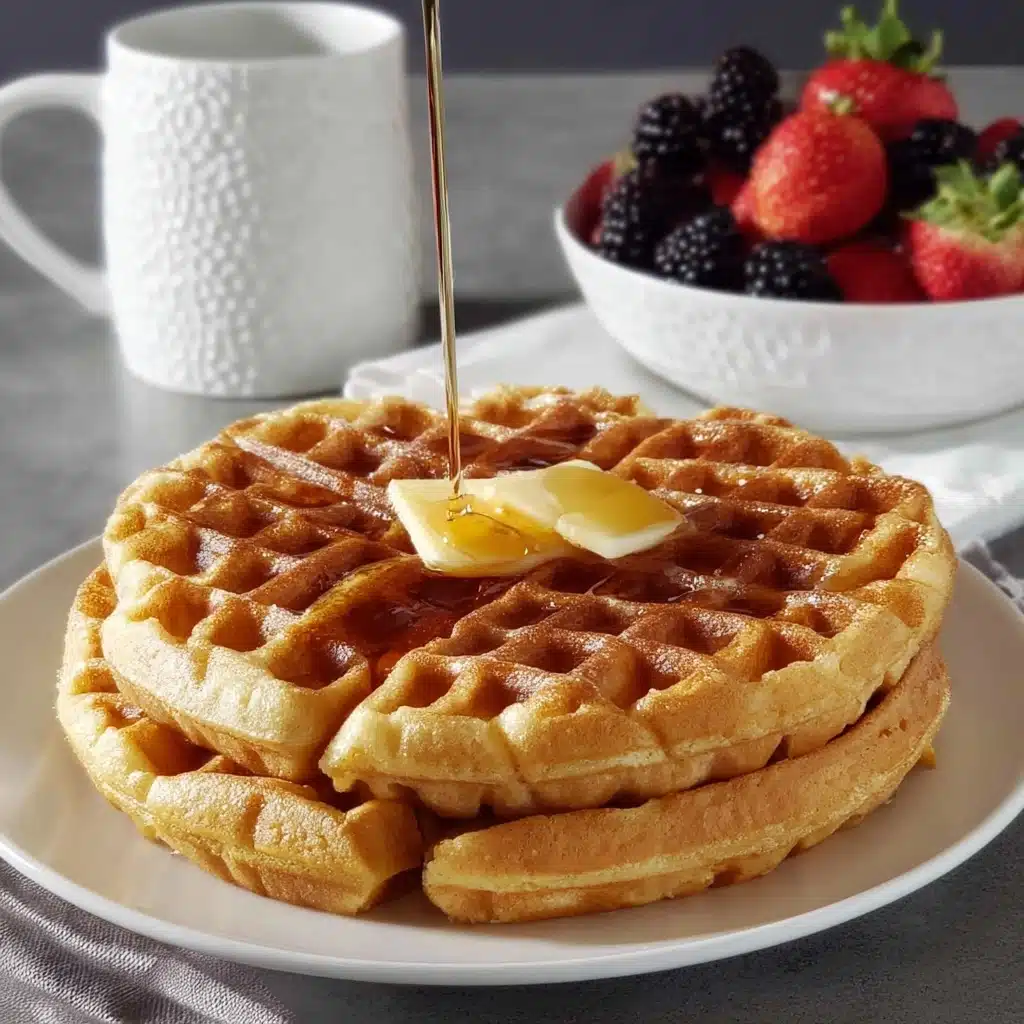
If you’re on the hunt for a delightful breakfast that you can prepare ahead and enjoy anytime, this freezer-friendly Crispy Waffle Recipe with Buttermilk is pure magic. These waffles come out perfectly golden and crisp, with that unmistakable tang from buttermilk that adds such a rich depth to the flavor. Whether you’re feeding a family or craving a quick morning treat, this recipe promises waffles that freeze beautifully and reheat just as crisp and tasty as fresh.
Ingredients You’ll Need
Everything in this recipe is thoughtfully chosen to create the perfect texture and flavor for these waffles. Each ingredient plays a role in balancing crispiness, moisture, and that comforting homemade taste you’ll love.
- 1 ¾ cups all-purpose flour: The base for your waffles, providing structure and a tender bite.
- ¼ cup cornstarch: Adds extra crispness while keeping waffles light and airy.
- 1 teaspoon baking powder: Helps the waffles rise and become fluffy inside.
- ½ teaspoon baking soda: Works with the buttermilk to create lift and tenderness.
- ½ teaspoon kosher salt: Enhances all the flavors perfectly without overpowering.
- 1 cup buttermilk (room temperature): Delivers tangy richness and tender crumb.
- 1 cup milk (room temperature): Keeps the batter moist and helps create a light texture.
- ½ cup unsalted butter (melted): Brings velvety richness and crisps up the exterior.
- 2 egg yolks: Adds body to the batter and deepens the flavor.
- 1 teaspoon vanilla extract: Infuses a subtle sweetness and warm aroma.
- 2 egg whites: Whipped to soft peaks, they lighten the batter for airy waffles.
- 2 tablespoons granulated sugar: Sweetens the waffles just enough and helps with browning.
How to Make freezer-friendly Crispy Waffle Recipe with Buttermilk
Step 1: Get Ready by Preheating
Before diving into mixing, preheat your oven to its lowest possible temperature to keep the cooked waffles warm and crisp as you finish the batch. Simultaneously, preheat your waffle iron so it’s ready to deliver those perfect golden pockets with every batch.
Step 2: Mix Your Dry Ingredients
In a large bowl, whisk together the all-purpose flour, cornstarch, baking powder, baking soda, and kosher salt. These dry ingredients form the foundation for the texture and rise of your waffles.
Step 3: Combine the Wet and Dry
Add the room temperature buttermilk, milk, melted unsalted butter, egg yolks, and vanilla extract to the dry ingredients. Gently stir everything together just until combined to avoid overworking the batter, which keeps your waffles light.
Step 4: Whip Egg Whites and Fold
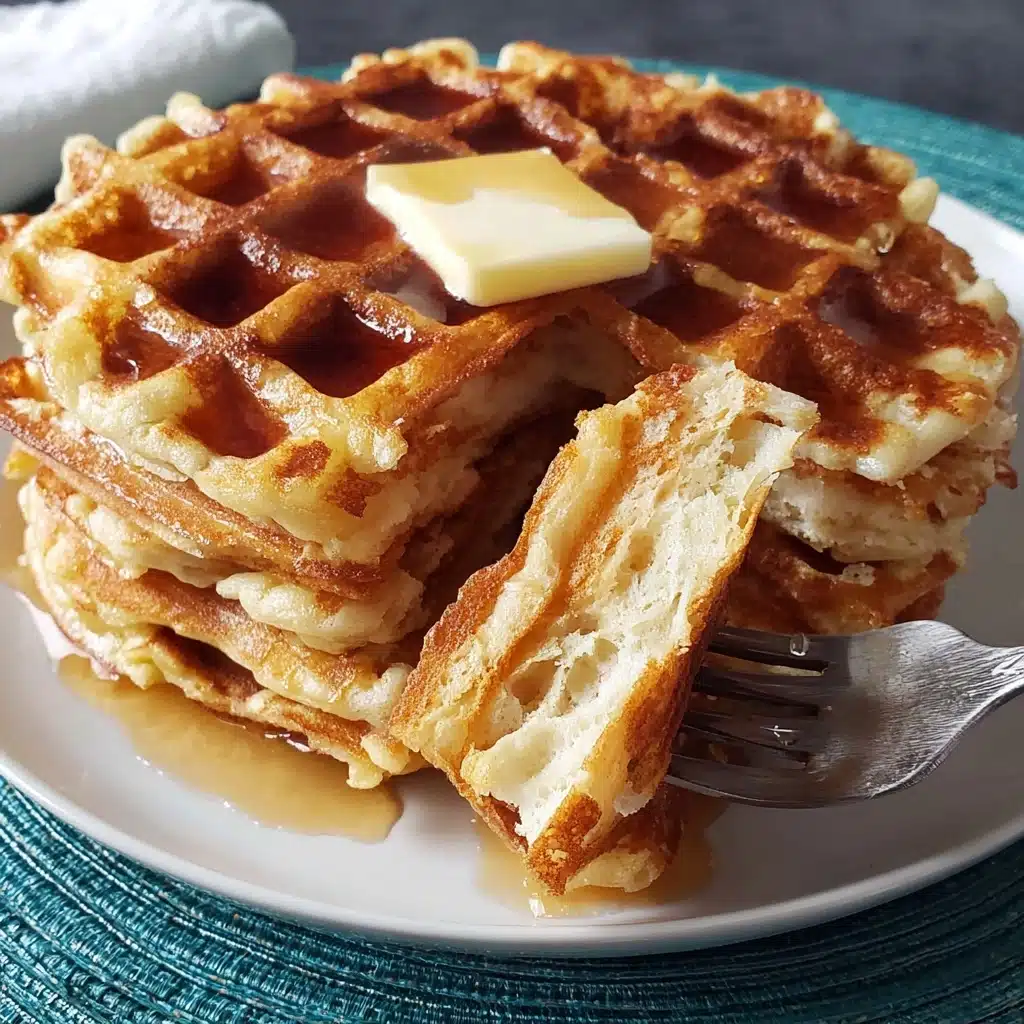
In a separate clean bowl, whisk the egg whites while gradually adding the sugar until you get soft, glossy peaks. Gently fold these whipped egg whites into the batter with a rubber spatula. This step is what guarantees your waffles come out delightfully airy without losing their crispy edge.
Step 5: Cook and Crisp
Follow your waffle iron’s instructions to cook each waffle. As soon as a waffle is done, place it directly on the oven rack to keep it warm and ensure it stays crisp without getting soggy. Repeat with remaining batter and enjoy that wonderful aroma filling your kitchen.
How to Serve freezer-friendly Crispy Waffle Recipe with Buttermilk
Garnishes
These waffles are delicious on their own, but topping them with fresh berries, a drizzle of maple syrup, or a dollop of whipped cream takes them to another level. Don’t forget a pat of butter melting into the crispy edges!
Side Dishes
Pair these waffles with crispy bacon, sausages, or turkey sausage patties for a hearty brunch. A fresh fruit salad or a side of scrambled eggs will balance the richness and make your morning meal feel complete.
Creative Ways to Present
Turn these waffles into a fun dessert by layering them with ice cream, chocolate sauce, and chopped nuts. For a savory twist, try topping with fried chicken and a sprinkle of hot sauce – a soul-warming, crispy delight anyone will rave about.
Make Ahead and Storage
Storing Leftovers
If you have leftover waffles that didn’t get eaten right away, it’s best to cool them completely before placing them in an airtight container or a resealable bag. Stored this way, they will stay fresh and delicious in the fridge for up to 3 days.
Freezing
One of the best features of this freezer-friendly Crispy Waffle Recipe with Buttermilk is that these waffles freeze beautifully. After cooling, wrap each waffle individually in parchment or wax paper, then store them in a freezer-safe bag. Freeze for up to 2 months without losing their crisp texture.
Reheating
To revive the crispy goodness, reheat your frozen waffles in a toaster or an oven set at 350°F until warmed through and crisp again, usually about 5 to 10 minutes. Avoid microwaving if possible, as it can make waffles soggy.
FAQs
Can I use regular milk instead of buttermilk?
While you can substitute regular milk mixed with a little lemon juice or vinegar to mimic buttermilk, using real buttermilk gives the best tang and texture that make these waffles stand out especially in this recipe.
Why do I need to whip the egg whites separately?
Whipping the egg whites creates air pockets that make the waffles lighter and fluffier. Folding them gently into the batter ensures that you don’t lose that airy texture, while still keeping the exterior crisp.
Can I make the batter ahead of time?
It’s best to prepare the batter fresh to get the fluffiest waffles. Egg whites start to lose their volume quickly, so folding them in just before cooking will give you the best results.
How do I prevent waffles from becoming soggy after freezing?
Cooling the waffles completely before freezing and storing them individually wrapped helps lock in crispness. Reheating in a toaster or oven instead of the microwave ensures they stay crispy.
What if I don’t have cornstarch on hand?
Cornstarch is key for that crispy texture, but if you don’t have it, you can substitute with potato starch or tapioca starch in equal amounts to still get a nice crunch.
Final Thoughts
Trust me, once you try this freezer-friendly Crispy Waffle Recipe with Buttermilk, it will become your go-to for quick, delicious breakfasts any day of the week. The combination of tangy buttermilk and a crispy finish with homemade love just can’t be beat. Give it a go, freeze a batch, and thank yourself later for mornings that are tasty and stress-free.
Printfreezer-friendly Crispy Waffle Recipe with Buttermilk Recipe

This freezer-friendly crispy waffle recipe combines buttermilk with a light mix of cornstarch and whipped egg whites to create perfectly crisp and fluffy waffles. Ideal for batch cooking, these waffles stay crispy when reheated, making them a convenient and delicious breakfast option.
- Prep Time: 15 minutes
- Cook Time: 20 minutes
- Total Time: 35 minutes
- Yield: 6–8 waffles 1x
- Category: Breakfast
- Method: Waffle Iron Cooking
- Cuisine: American
- Diet: Vegetarian
Ingredients
Dry Ingredients
- 1 ¾ cups all-purpose flour
- ¼ cup cornstarch
- 1 teaspoon baking powder
- ½ teaspoon baking soda
- ½ teaspoon kosher salt
- 2 tablespoons granulated sugar
Wet Ingredients
- 1 cup buttermilk (room temperature)
- 1 cup milk (room temperature)
- ½ cup unsalted butter (melted)
- 2 egg yolks
- 1 teaspoon vanilla extract
Additional
- 2 egg whites
Instructions
- Preheat Appliances: Preheat your oven to its lowest temperature to keep waffles warm and crisply reheated. Also preheat your waffle iron according to manufacturer instructions to ensure even cooking.
- Mix Dry Ingredients: In a large bowl, whisk together the all-purpose flour, cornstarch, baking powder, baking soda, and kosher salt to ensure an even distribution of leavening agents and seasonings.
- Combine Wet Ingredients: Add the buttermilk, milk, melted unsalted butter, egg yolks, and vanilla extract to the dry ingredients. Stir gently until the batter is just combined, avoiding overmixing to keep waffles tender.
- Whip Egg Whites: In a separate clean bowl, whisk the egg whites until they become frothy. Gradually add the granulated sugar while continuing to whisk until soft peaks form, which will help create light and airy waffles.
- Fold in Egg Whites: Using a rubber spatula, gently fold the whipped egg whites into the waffle batter until just blended to maintain the airiness of the batter.
- Cook Waffles: Cook waffles according to your waffle iron’s instructions. Once cooked, transfer each waffle directly to the oven rack to keep warm and enhance crispiness while cooking the remaining batter.
- Serve: Add your favorite toppings such as maple syrup, fresh fruit, or whipped cream and enjoy your crispy, fluffy waffles.
Notes
- Do not overmix the batter; folding in the egg whites gently helps maintain the waffles’ crispiness and fluffiness.
- Preheating the oven and placing cooked waffles on the oven rack keeps them warm and crisp without becoming soggy.
- These waffles freeze well; cool completely before freezing in airtight bags. Reheat in a toaster or oven to restore crispness.
- Room temperature dairy and eggs help the batter mix more evenly.
- Using cornstarch in the flour mixture increases the crisp texture of the waffles.
Nutrition
- Serving Size: 1 waffle (approx. 120g)
- Calories: 260
- Sugar: 4g
- Sodium: 350mg
- Fat: 12g
- Saturated Fat: 7g
- Unsaturated Fat: 4g
- Trans Fat: 0g
- Carbohydrates: 29g
- Fiber: 1g
- Protein: 6g
- Cholesterol: 95mg
Keywords: crispy waffles, buttermilk waffles, freezer-friendly waffles, breakfast waffles, waffle recipe, easy waffles
