
Fruity Pebbles Sushi – A Fun & Colorful No-Bake Dessert Recipe
Introduction
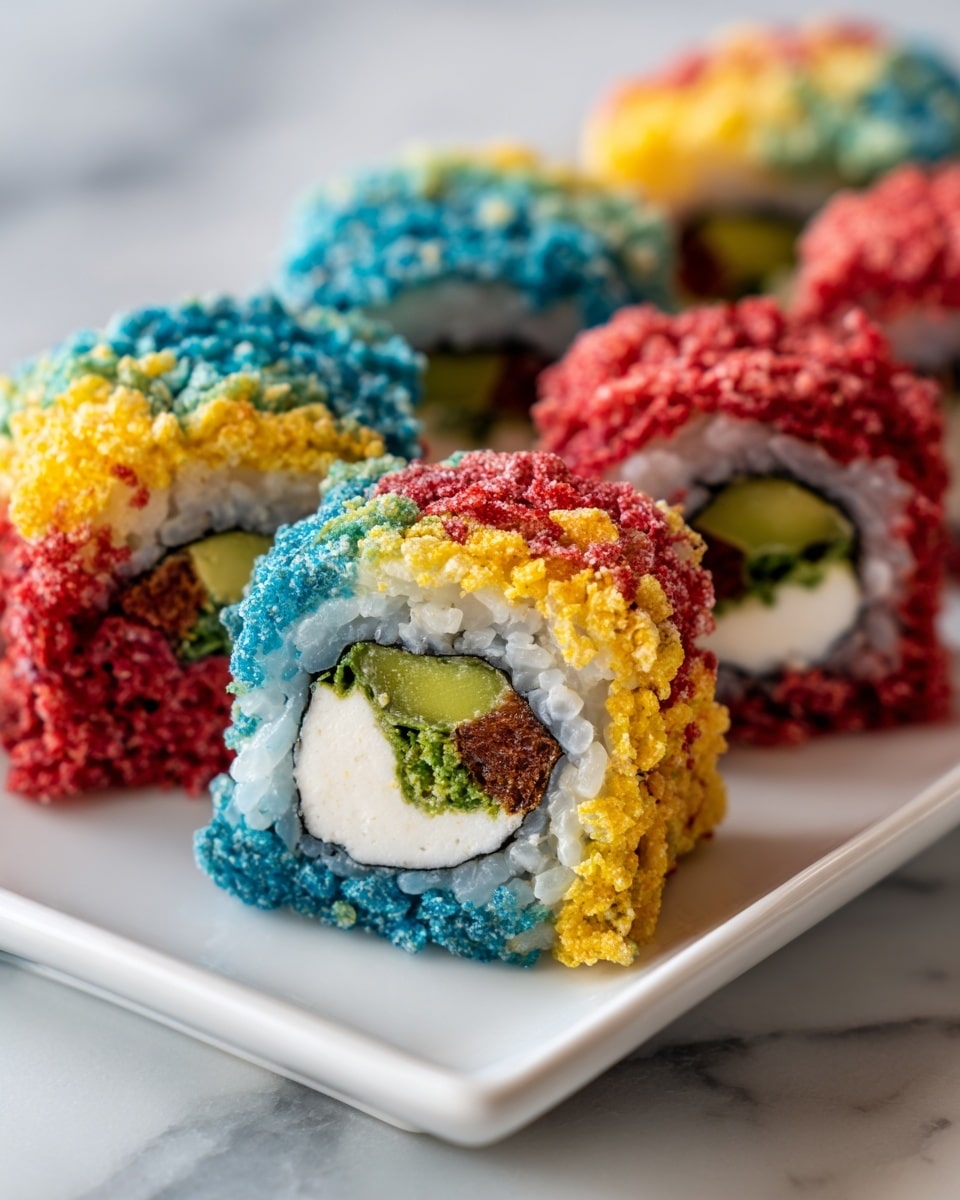
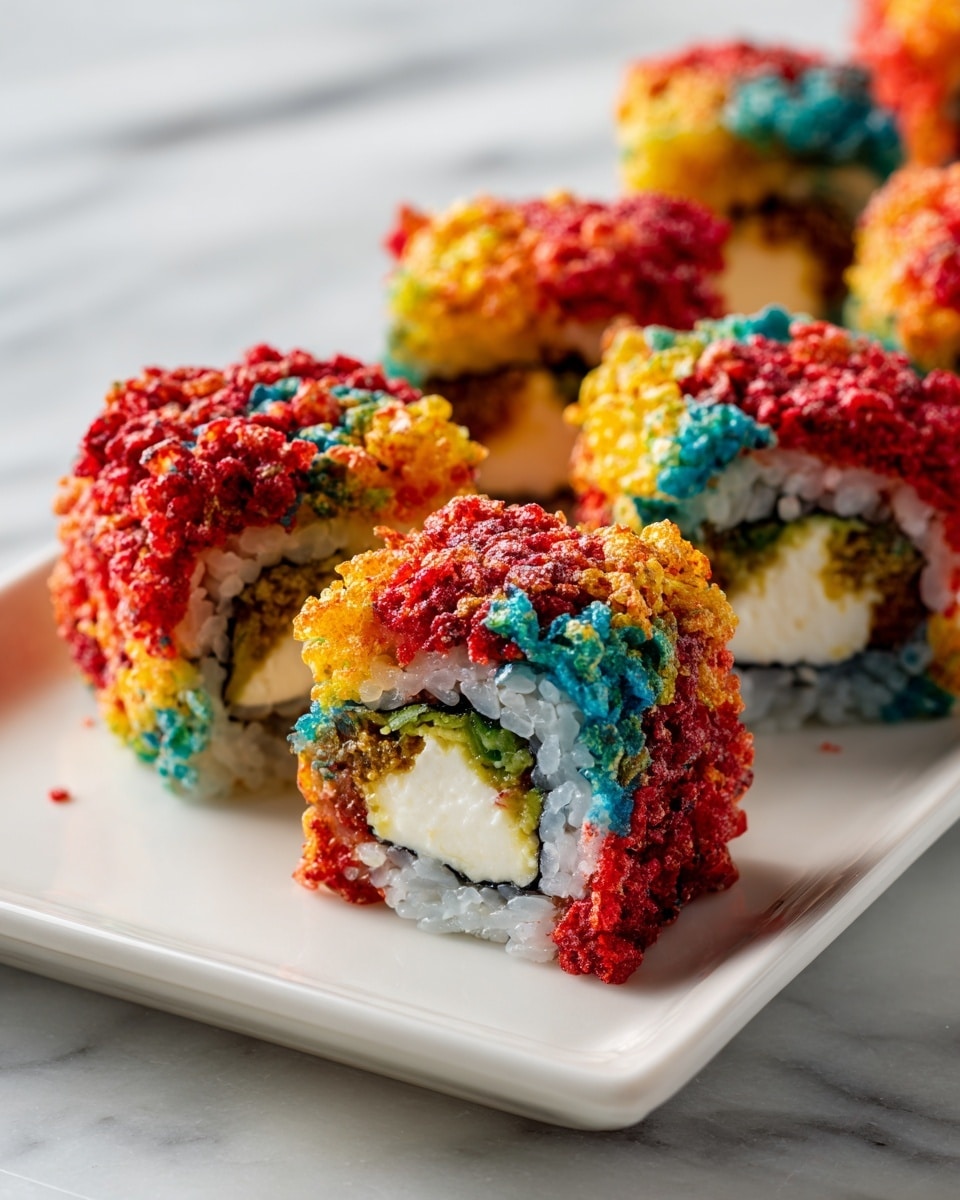
If you’re searching for a dessert that’s as fun to make as it is to eat, this Fruity Pebbles Sushi is your answer. Vibrant, colorful, and bursting with sweet, nostalgic flavors, it’s a playful twist on traditional sushi that everyone will love. Perfect for parties, kids, or any time you want a no-bake treat that delights.
Ingredients
- 3 tablespoons unsalted butter
- 280g (10-ounce) bag of mini marshmallows
- 6 cups (about 170g) Fruity Pebbles cereal
- Optional fillings: gummy worms, Swedish Fish, colourful Fruit Roll-Ups, or other sweets
Instructions
- Step 1: Lightly grease a 9×13-inch baking tin or large baking sheet with butter or non-stick spray. Line it with baking parchment, allowing sides to overhang for easy removal later.
- Step 2: Melt the butter in a large saucepan over low heat. Add mini marshmallows and stir continuously until completely melted and smooth. Avoid burning.
- Step 3: Remove from heat and immediately fold in the Fruity Pebbles cereal gently using a greased spatula, coating evenly without crushing.
- Step 4: Turn the mixture onto the prepared parchment. Cover with another greased parchment sheet and press into a thin, even rectangle about 1/4 inch thick using a rolling pin or your hands.
- Step 5: If using, remove the top parchment and arrange your chosen fillings in a straight line along one long edge of the rectangle.
- Step 6: Starting at the edge with fillings, carefully lift and roll the mixture into a tight log using the bottom parchment. Press gently to keep it compact.
- Step 7: Wrap the log tightly in parchment or cling film and refrigerate for 20–30 minutes to firm up.
- Step 8: Unwrap and slice the chilled log into 1-inch rounds using a well-greased sharp knife. Arrange on a platter and enjoy!
Tips & Variations
- Grease your spatula, hands, baking parchment, and knife to prevent sticking when handling marshmallow mixtures.
- Work quickly to spread and roll before the marshmallow mixture sets.
- Try substituting Fruity Pebbles with Cocoa Pebbles, Rice Krispies, Froot Loops, or Trix for different flavors and colors.
- Add a thin layer of Nutella or mini chocolate chips as a creative filling twist.
- Customize for holidays using festive colored gummies or sprinkles to suit the occasion.
Storage
Store sliced Fruity Pebbles sushi in a single layer inside an airtight container at room temperature for up to three days. Place parchment sheets between layers to prevent sticking. Avoid refrigeration as it can harden the treats. Enjoy at room temperature for the best texture.
How to Serve
Serve this delicious recipe with your favorite sides.
FAQs
Can I use large marshmallows instead of mini ones?
Yes, you can, but larger marshmallows take longer to melt. Cutting them into smaller pieces helps, and be sure to stir constantly over low heat to melt them evenly without burning.
My mixture is too sticky to handle. What should I do?
Grease your hands with butter or non-stick spray before handling. This creates a barrier that prevents sticking and makes rolling and pressing much easier.
Is this recipe gluten-free?
Fruity Pebbles cereal is often gluten-free, but always check the packaging to be sure. Also, verify your marshmallows’ ingredient list. For the most accurate info, visit the Post Consumer Brands website.
Can I make these Fruity Pebbles sushi treats ahead of time?
Yes, you can prepare them up to a day in advance. After slicing, store in an airtight container at room temperature until serving.
PrintFruity Pebbles Sushi – A Fun & Colorful No-Bake Dessert Recipe

Fruity Pebbles Sushi is a vibrant, no-bake dessert that transforms classic cereal treats into fun sushi-inspired rolls. Combining melted mini marshmallows, buttery sweetness, and the colorful crunch of Fruity Pebbles cereal, this playful recipe is perfect for parties, kids’ activities, or anytime you crave a nostalgic, sweet snack with a creative twist.
- Prep Time: 10 minutes
- Cook Time: 10 minutes
- Total Time: 30 minutes
- Yield: Approximately 12–15 sushi slices 1x
- Category: Dessert
- Method: No-Cook
- Cuisine: American
- Diet: Gluten Free
Ingredients
Main Ingredients
- 3 tablespoons unsalted butter
- 280g (10-ounce) bag of mini marshmallows
- 6 cups (about 170g) Fruity Pebbles cereal
Optional Fillings
- Gummy worms
- Swedish Fish
- Colorful Fruit Roll-Ups
Instructions
- Prepare Your Workstation: Lightly grease a 9×13-inch baking tin or large baking sheet with butter or non-stick spray, then line it with a piece of baking parchment that overhangs the sides for easier handling later.
- Melt the Marshmallows: In a large heavy-bottomed saucepan over low heat, melt the butter completely. Add the mini marshmallows and stir continuously until they have fully melted into a smooth, glossy mixture. Be careful not to burn the marshmallows.
- Combine with Cereal: Remove the pan from heat immediately, then gently fold in the Fruity Pebbles cereal with a greased spatula until evenly coated, taking care not to crush the cereal.
- Press and Flatten: Quickly turn the mixture onto the prepared parchment. Cover with a second greased sheet of parchment, then press or roll the mixture into an even rectangle about 1/4 inch thick.
- Add Your Fillings (Optional): Remove the top parchment sheet and arrange desired fillings like gummy worms or licorice laces in a straight line along one long edge of the rectangle.
- Roll It Up!: Using the bottom parchment sheet to help, carefully roll the mixture into a tight log starting from the edge with the fillings. Apply gentle, consistent pressure to compact the roll.
- Chill and Set: Wrap the sushi log in baking parchment or cling film and refrigerate for at least 20-30 minutes to firm up, which will help with clean slicing.
- Slice and Serve: Once set, unwrap the roll and cut into 1-inch thick rounds using a large sharp knife lightly greased with butter or cooking spray. Arrange the slices on a serving platter and enjoy!
Notes
- Grease your spatula, hands, parchment, and knife to prevent sticking from the marshmallow mixture.
- Work quickly as the marshmallow mixture hardens soon after being removed from heat.
- Fold the cereal gently to avoid crushing and keep the colors vibrant.
- Roll the log tightly for neat, round sushi pieces.
- Chilling before slicing is crucial to prevent squashing the roll.
- Store leftover sushi pieces in an airtight container at room temperature for up to 3 days, separating layers with parchment to prevent sticking.
- Check the packaging to confirm Fruity Pebbles and marshmallows are gluten-free if needed.
Keywords: Fruity Pebbles sushi, cereal treats, no bake dessert, colorful dessert, kids party food, marshmallow cereal rolls


