
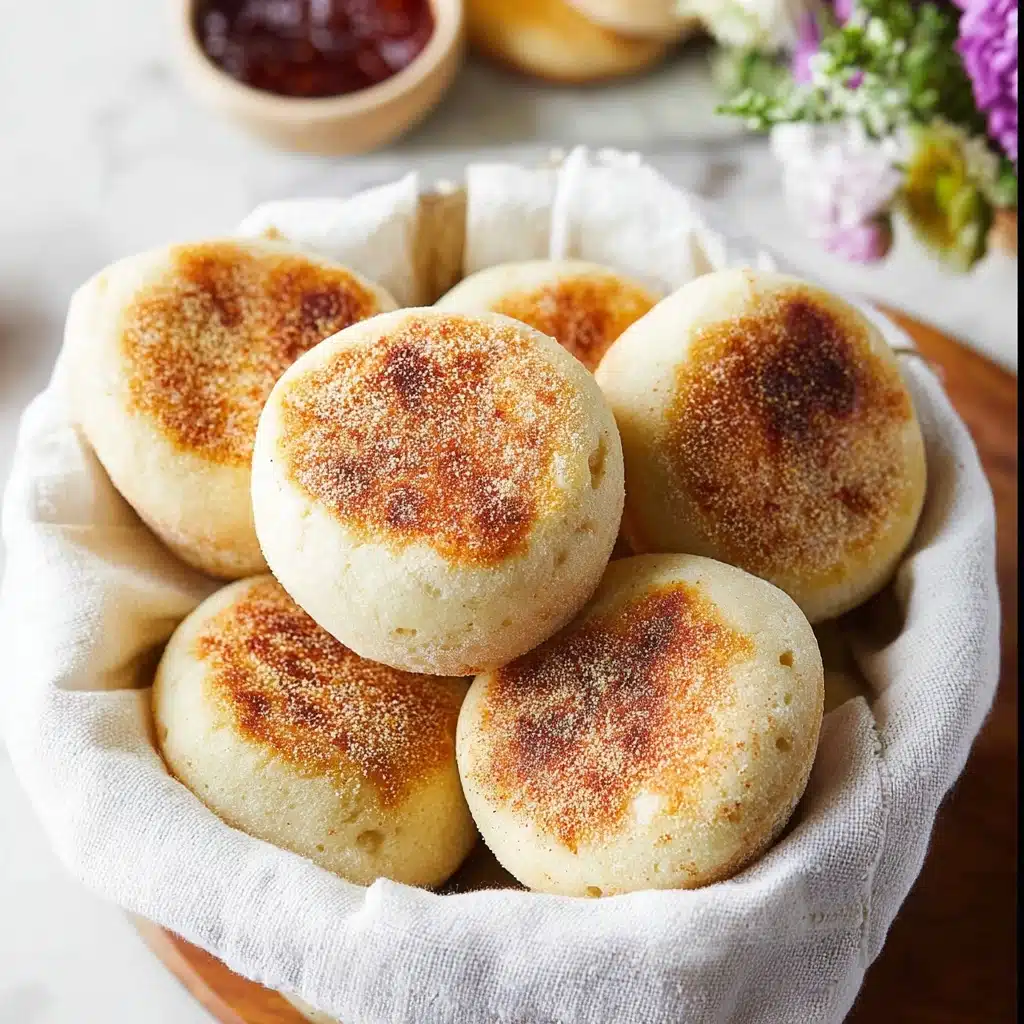
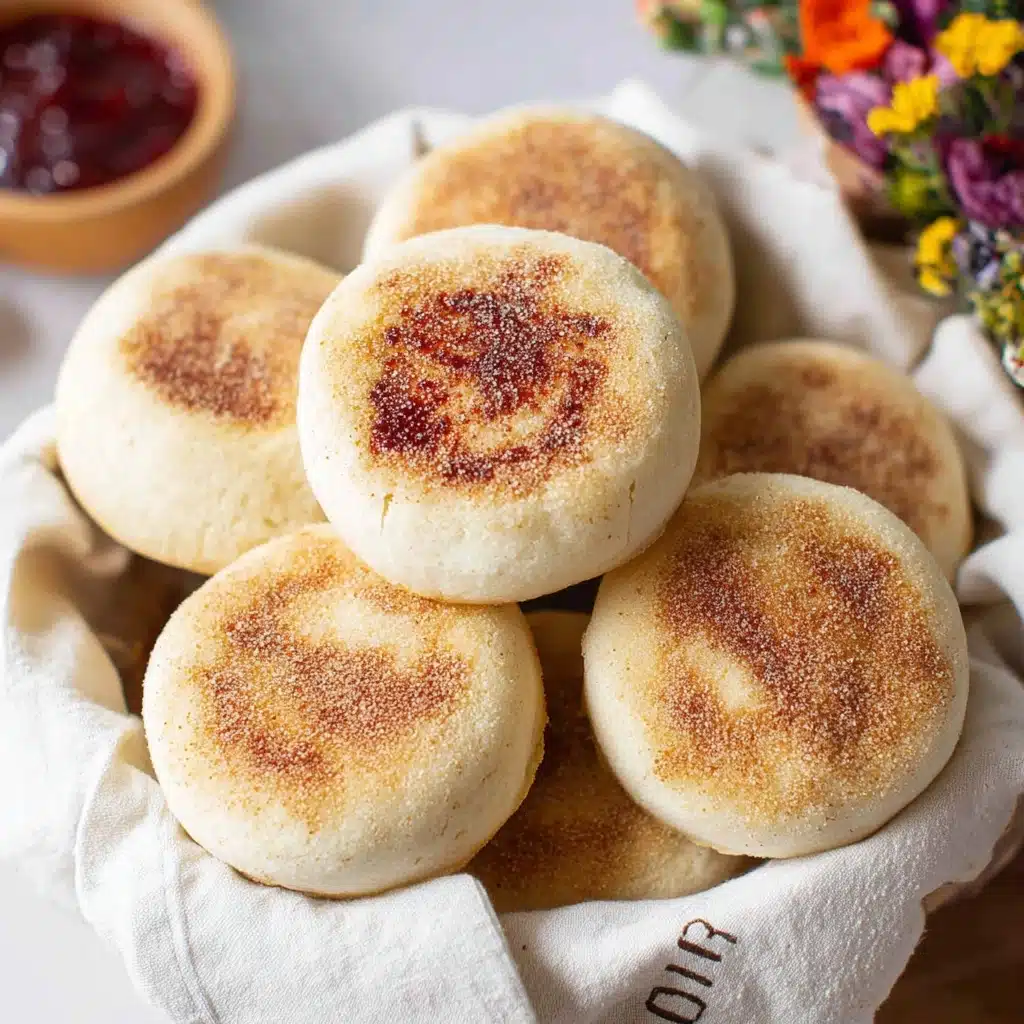
Homemade English Muffins Recipe
If you’re craving that delightful, slightly tangy, and satisfyingly chewy bread that’s perfect for breakfast or any snack, look no further than these Homemade English Muffins. They boast a wonderfully tender crumb full of nooks and crannies, ideal for soaking up butter, jam, or your favorite toppings. Making Homemade English Muffins from scratch might sound intimidating, but trust me, once you taste their fresh, warm goodness right off the griddle, you’ll never want to go back to store-bought ones again. This recipe balances a simple ingredient list with patient fermentation to give you muffins bursting with flavor and texture that’s totally worth the wait.
Ingredients You’ll Need
Gathering your ingredients is a breeze, and each one plays a crucial role in bringing these muffins to life. From the flour that builds structure to the yeast that gives them their airy texture, every component works together to create that perfect bite.
- All-purpose flour: This versatile flour provides the foundation for the muffins’ tender crumb and sturdy structure.
- Water: Used in the starter to activate the yeast and begin flavor development with a gentle fermentation.
- Dry active yeast: Essential for leavening, giving your muffins their characteristic fluff and lift.
- Soy milk (or any milk of choice): Adds moisture and a subtle richness, helping the dough stay soft and tender.
- Sugar: A small amount to feed the yeast and enhance browning and flavor complexity.
- Olive oil (or melted butter): This fat enriches the dough, making the muffins soft and adding a slight buttery flavor.
- Salt: Balances the sweetness and enhances all the flavors in the muffins.
- Cornmeal: Coats the baking tray and muffin tops for a traditional slightly crunchy crust and prevents sticking.
- Oil or butter for the skillet: Provides a beautiful golden crust and helps cook the muffins evenly without sticking.
How to Make Homemade English Muffins
Step 1: Make the Starter
Combining water, flour, and yeast, the starter is the secret hero of these muffins, initiating fermentation that brings out their signature tangy flavor. Mix these ingredients together until smooth, then cover the bowl and let it rest in a warm spot anywhere from 1 to 12 hours. You’ll notice the starter become bubbly and double in size—this is your signal that it’s ready and packed with flavor.
Step 2: Prepare the Dough
In a large bowl or the bowl of your stand mixer, blend the milk with the yeast. Carefully fold in the bubbly starter you prepared earlier, whisking everything to combine thoroughly. Next, add sugar, olive oil, salt, and most of the flour to create a rough, shaggy dough. This is the foundation for your muffins’ perfect texture.
Step 3: Knead the Dough
If you’re using a stand mixer, switch to the dough hook and knead the dough for about 10 minutes. You might need to add a little extra flour if it’s sticky—that’s completely normal. Aim for a smooth, soft ball of dough that feels tacky but not overly sticky. No stand mixer? No problem! You can knead this dough by hand on a floured surface, and though sticky at first, it will come together nicely with a bit of patience.
Step 4: First Rise and Refrigeration
After kneading, place your dough in a lightly greased bowl, cover it, and refrigerate overnight. The slow chill allows the flavors to deepen and the dough to rest. If you’re short on time, let it proof in a warm place for 1.5 hours or until doubled in size. Either way, the dough can happily wait in the fridge for up to three days, making it a flexible recipe for busy schedules.
Step 5: Shape and Second Rise
Once chilled or proofed, turn the dough onto a floured surface and divide it into 12 equally sized pieces. Roll each piece into a smooth ball, then arrange them on a baking tray generously sprinkled with cornmeal, which helps create that classic, slightly gritty bottom crust. Sprinkle more cornmeal on top for that inviting texture. Allow the dough balls to double in size—this usually takes about 1 to 1.5 hours, though sometimes less if your kitchen is warm.
Step 6: Cook on the Skillet
Heat a skillet or sauté pan over medium heat and brush it with oil or butter. Gently place 3 to 4 muffin dough balls on the pan, cooking them until the bottom is beautifully golden brown—about 6 to 7 minutes. Carefully flip and brown the other side for another 6 to 7 minutes. Keep an eye on the heat to avoid burning, and if you prefer, finish them off in a preheated 180C oven to ensure they’re cooked through without over-browning.
How to Serve Homemade English Muffins
Garnishes
Homemade English Muffins practically beg for butter melting in their nooks and crannies—this is the ultimate simple garnish. Beyond butter, try rich cream cheese, a dollop of your favorite jam, honey drizzle, or even a thick spread of nut butter. Herbs or a sprinkle of cinnamon sugar can elevate these muffins from everyday to special treat status.
Side Dishes
These muffins are fabulous companions to hearty breakfast dishes like scrambled eggs, bacon, or sausage. Serve alongside fresh fruit or a vibrant salad for a lighter snack. Their chewy texture and subtle tang add welcome contrast to rich, creamy, or savory dishes.
Creative Ways to Present
Feel like getting creative? Use your Homemade English Muffins as mini sandwich buns filled with smoked salmon and cream cheese or avocado and tomato for a fresh twist. Or toast and top them with eggs Benedict-style poached eggs and hollandaise sauce for a brunch worthy of company. The possibilities are endless when you start with such a reliable and tasty base.
Make Ahead and Storage
Storing Leftovers
If you have leftovers, Homemade English Muffins keep wonderfully in the refrigerator for 5 to 6 days. Store them in an airtight container or wrapped tightly in plastic wrap to preserve moisture and prevent them from drying out.
Freezing
For longer storage, wrap individual muffins in plastic wrap and place them in a freezer-safe bag. They freeze beautifully for up to 3 months, making it easy to enjoy fresh-tasting muffins whenever you want without the wait.
Reheating
The best part about frozen or refrigerated Homemade English Muffins is how easily they come back to life. Simply toast them straight from the fridge or freezer until warm and golden. This revives that crispy crust and soft interior perfectly, as if they were freshly made.
FAQs
Can I use regular milk instead of soy milk?
Yes, absolutely! Feel free to use any type of milk you prefer, whether it’s dairy or a plant-based alternative. The milk adds moisture and richness but won’t drastically change the outcome.
Is it necessary to refrigerate the dough overnight?
While not required, refrigerating overnight really improves the flavor through slow fermentation. If you’re short on time, allowing the dough to proof for 1.5 hours at room temperature also works well.
Why do I need cornmeal on the baking tray?
Cornmeal prevents the muffins from sticking and adds that delightful slightly crunchy texture on the bottom that’s signature to English muffins.
Can I make these gluten-free?
This recipe relies on all-purpose flour for structure, so gluten-free substitutions would need specific blends and adjustments. If you want to try, look for a gluten-free baking flour mix designed for yeast breads and experiment cautiously.
How do I know when the muffins are cooked through?
Golden brown crust on both sides and a firm, springy texture means they are ready. If you’re unsure, finishing them in a moderate oven for a few minutes after skillet cooking will ensure they’re cooked inside without drying out.
Final Thoughts
Making Homemade English Muffins is such a rewarding experience, and I promise the result is worth every step. From a simple starter to that final golden crust, they transform humble ingredients into a breakfast favorite bursting with flavor and comfort. So why not give this recipe a try and treat yourself to warm Muffins fresh from your own kitchen? Once you taste these, store-bought muffins will be a thing of the past!
PrintHomemade English Muffins Recipe

Homemade English Muffins are soft, lightly chewy bread rounds with a delightfully crisp exterior and a signature nooks-and-crannies texture inside. Made using a simple yeast starter and cooked gently on a skillet, these muffins are perfect toasted with butter, jam, or your favorite toppings. This recipe uses soy milk for a slightly dairy-free option, but any milk or milk alternative works well. A longer fermentation enhances flavor, resulting in deeply satisfying, fresh, homemade English muffins.
- Prep Time: 20 minutes (plus up to 12 hours optional starter fermentation and 1.5 hours dough proofing)
- Cook Time: 15 minutes
- Total Time: 2 hours 35 minutes active time (plus up to 12 hours inactive starter fermentation or overnight refrigeration)
- Yield: 12 English muffins 1x
- Category: Breakfast, Snack, Bread
- Method: Yeast fermentation, Skillet cooking
- Cuisine: British
- Diet: Vegetarian
Ingredients
Starter
- 3/4 cup All purpose flour
- 1/2 cup Water
- 1/2 tsp Dry active yeast
Dough
- 1 cup Soy milk (or any milk of choice)
- 1 tsp Dry active yeast
- 2 tbsp Sugar
- 2 tbsp Olive oil (or melted butter)
- 1 tsp Salt
- 3 cup All purpose flour (plus extra as needed for kneading)
For Cooking
- 3–4 tbsp Cornmeal (for sprinkling on baking tray)
- 1–2 tbsp Oil or butter (for skillet)
Instructions
- Prepare the Starter: In a small bowl, mix 3/4 cup flour, 1/2 cup water, and 1/2 tsp dry active yeast until smooth. Cover and place in a warm spot for 1 to 12 hours until bubbly and doubled in volume. Longer fermentation improves flavor.
- Make the Dough: In a stand mixer bowl or large bowl, combine 1 cup soy milk and 1 tsp dry active yeast. Add the starter and whisk to combine well. Stir in 2 tbsp sugar, 2 tbsp olive oil, 1 tsp salt, and 3 cups flour until you form a rough, scraggy dough.
- Knead the Dough: Using a dough hook or your hands on a floured surface, knead the dough for about 10 minutes until smooth and soft. Add up to 2 tablespoons more flour if dough is too sticky. The dough should be tacky but not overly sticky when ready.
- First Proof: Place the dough ball in a lightly greased bowl, cover, and refrigerate overnight or let it rise at room temperature in a warm spot for 1.5 hours until doubled. The dough can be refrigerated for up to 3 days if needed.
- Shape the Muffins: Turn dough out onto a floured surface and divide into 12 equal portions. Roll each into a tight ball. Place the balls on a baking tray dusted with cornmeal and sprinkle the tops with cornmeal.
- Second Proof: Cover and let the dough balls rise in a warm spot until doubled in size, about 1 to 1.5 hours. They may puff up faster, around 30 minutes.
- Cook the Muffins: Heat a skillet over medium heat and brush lightly with oil or butter. Cook 3-4 muffins at a time until the bottoms are golden brown, about 6-7 minutes. Flip and cook the other side for another 6-7 minutes. Adjust heat as needed to avoid burning.
- Optional Oven Finish: If preferred, finish cooking the muffins in a preheated oven at 180°C (350°F) for a few minutes to ensure even cooking.
- Serve: Slice the muffins horizontally and enjoy warm, spread with butter or your favorite toppings. These muffins toast beautifully and keep for 5-6 days refrigerated.
Notes
- For better flavor, allow the starter to ferment longer, up to 12 hours.
- If you do not have a stand mixer, kneading by hand works perfectly well.
- You can substitute soy milk with cow’s milk or other plant-based milk according to preference.
- Keep an eye on skillet temperature to prevent muffins from browning too quickly or burning.
- These muffins freeze well; thaw and toast for fresh flavor.
Nutrition
- Serving Size: 1 muffin (approximately 70g)
- Calories: 150
- Sugar: 3g
- Sodium: 220mg
- Fat: 4g
- Saturated Fat: 0.5g
- Unsaturated Fat: 3g
- Trans Fat: 0g
- Carbohydrates: 27g
- Fiber: 1g
- Protein: 5g
- Cholesterol: 0mg
Keywords: English muffins, homemade bread, skillet bread, breakfast bread, yeast bread, soft muffins, toaster bread


