
How to Make Sushi Rice Recipe
Introduction
Sushi rice is the foundation of any great sushi dish, offering a perfect balance of sticky texture and subtle tanginess. This recipe guides you through making authentic, flavorful sushi rice that’s ideal for rolls or bowls. With just a few simple ingredients, you’ll have restaurant-quality rice at home.
Ingredients
- 2 cups sushi rice
- 2 ½ cups water
- ¼ cup rice vinegar
- 1-2 tablespoons sugar
- 1 teaspoon salt (to taste)
Instructions
- Step 1: Rinse the rice thoroughly under running water using a fine mesh strainer for 2-3 minutes until the water runs clear. This removes excess starch for better texture.
- Step 2: Combine rinsed rice and 2 ½ cups water in a pot. Bring to a boil, then reduce heat to low, cover, and simmer for 20 minutes, or until water is absorbed and rice is tender.
- Step 3: While the rice cooks, in a small saucepan, mix rice vinegar, sugar, and salt over medium heat. Whisk continuously until sugar and salt dissolve, about 2-3 minutes, then remove from heat.
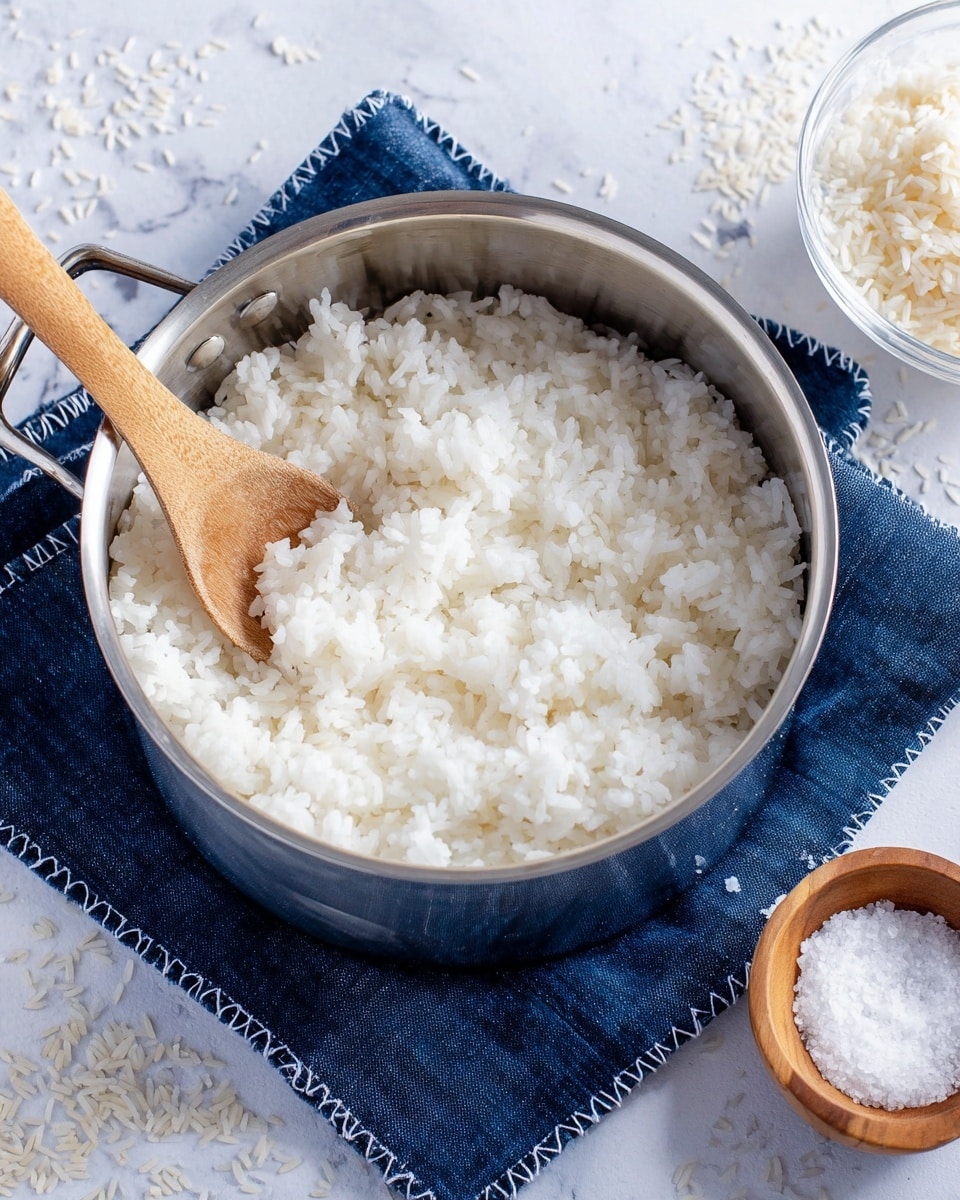
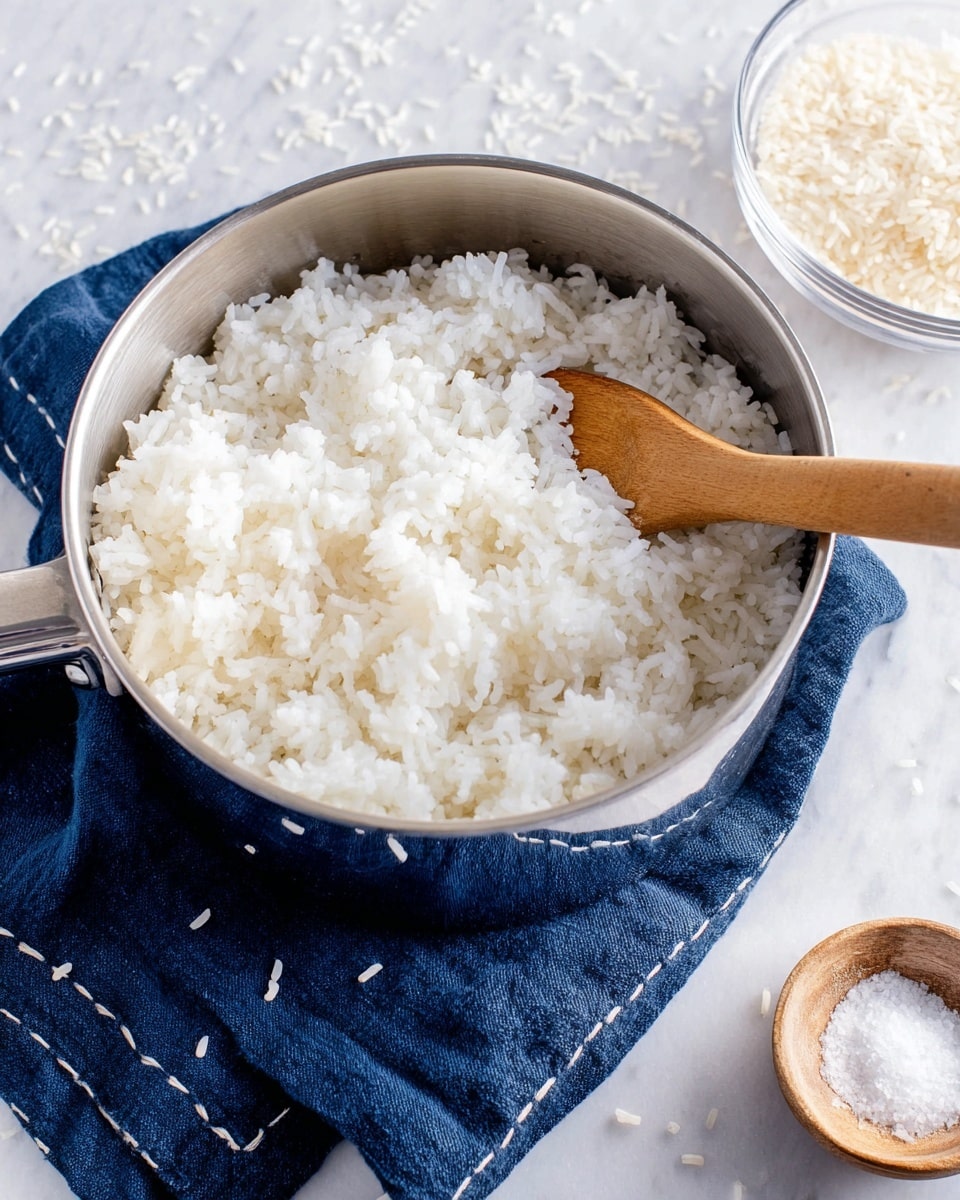
- Step 4: Transfer the cooked rice to a large bowl. Pour the vinegar mixture evenly over the hot rice and gently fold it in using a rice paddle or silicone spatula. Avoid smashing the rice; use a gentle folding motion.
- Step 5: Cover the rice with a damp paper towel to keep it moist and let it cool to room temperature before using. This prevents it from drying out and helps develop the perfect texture.
Tips & Variations
- For a slightly richer flavor, add a small piece of kombu (dried kelp) to the water while cooking the rice, removing it before simmering.
- If you prefer less sweetness, adjust the sugar to your taste or omit it entirely for a more vinegary rice.
- Use a wooden or plastic rice paddle to fold the rice so it doesn’t stick and remains fluffy.
Storage
Store leftover sushi rice in an airtight container at room temperature if using the same day. For longer storage, refrigerate for up to 24 hours, but note that refrigeration can make the rice harden. To reheat, sprinkle a little water on the rice and gently steam or microwave covered to restore moisture.
How to Serve
Serve this delicious recipe with your favorite sides.
FAQs
Can I use regular white rice instead of sushi rice?
Regular white rice lacks the specific starch content that makes sushi rice sticky and ideal for sushi. Using sushi rice will give you the best texture and flavor.
Why do I need to let the rice cool before making sushi?
Cooling the rice to room temperature ensures it’s not too hot to handle and prevents the sushi ingredients, especially seaweed, from becoming soggy when assembled.
PrintHow to Make Sushi Rice Recipe
Learn how to make perfect sushi rice with this simple and traditional recipe. This method produces flavorful, sticky rice seasoned just right with a mixture of rice vinegar, sugar, and salt, ideal for sushi rolls or vegetarian sushi bowls.
- Prep Time: 10 minutes
- Cook Time: 20 minutes
- Total Time: 30 minutes
- Yield: 8 servings 1x
- Category: Side Dish
- Method: Stovetop
- Cuisine: Japanese
- Diet: Gluten Free
Ingredients
Sushi Rice
- 2 cups sushi rice
- 2 ½ cups water
Vinegar Mixture
- ¼ cup rice vinegar
- 1–2 tablespoons sugar
- 1 teaspoon salt (to taste)
Instructions
- Rinse Rice: Place the sushi rice in a fine mesh strainer and rinse under running cold water for 2-3 minutes. Continue until the water runs clear to remove excess starch and prevent the rice from becoming too sticky.
- Boil Rice: Combine rinsed rice and 2 ½ cups of water in a pot. Bring to a boil over medium-high heat. Once boiling, reduce the heat to low, cover with a lid, and let the rice simmer for 20 minutes until all the water is absorbed and the rice is tender.
- Make Vinegar Mixture: In a small saucepan, combine the rice vinegar, sugar, and salt. Heat over medium heat while whisking continuously until the sugar and salt dissolve completely, about 2-3 minutes. Remove from heat and let it cool slightly.
- Season Rice: Transfer the cooked rice to a large bowl. Evenly pour the seasoned vinegar mixture over the rice. Using a rice paddle or silicone spatula, gently fold the rice to coat each grain without smashing, ensuring even distribution of seasoning.
- Cover to Cool: Cover the seasoned rice with a damp paper towel to keep it moist and prevent drying. Allow it to cool to room temperature before using it to make sushi rolls or serving it in vegetarian sushi bowls.
Notes
- Rinsing the rice thoroughly is crucial to achieve the perfect texture.
- Adjust sugar and salt in the vinegar mixture to taste based on preference.
- Use a wooden or plastic spatula to avoid breaking the rice grains while mixing.
- Sushi rice is best used at room temperature for making sushi rolls.
- Leftover sushi rice can be stored in an airtight container in the refrigerator for up to 24 hours but is best used fresh.
Keywords: sushi rice recipe, how to make sushi rice, seasoned sushi rice, Japanese rice, sushi rice seasoning


