
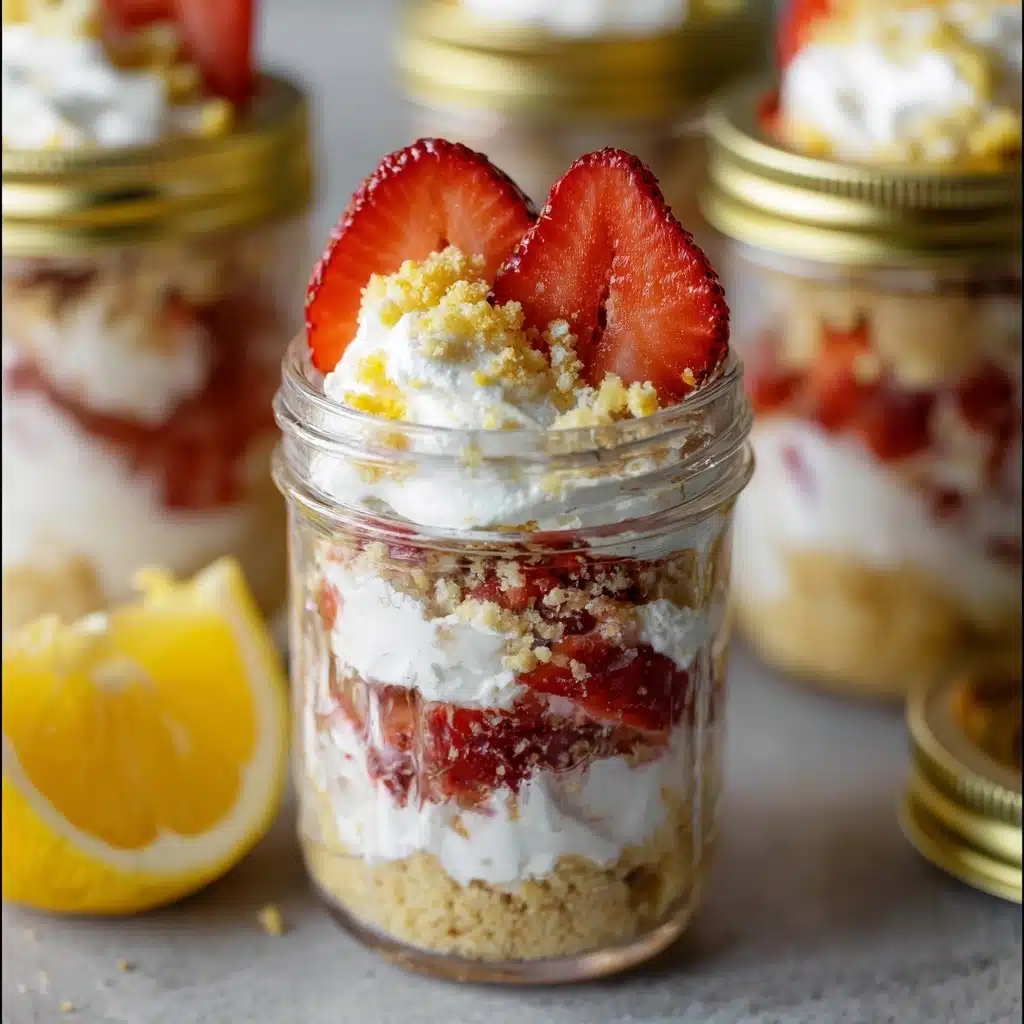
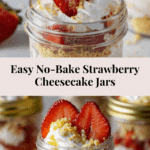
No-Bake Strawberry Cheesecake Jars Recipe
The No-Bake Strawberry Cheesecake Jars are everything you want in a dessert: creamy, sweet, beautifully layered, and—best of all—quick to make without ever turning on the oven. This recipe combines tangy cream cheese, Greek yogurt, luscious whipped topping, and juicy strawberries with a buttery vanilla wafer crust, all tucked into charming mason jars. Perfect for picnics, easy entertaining, or just a fun night in, these jars bring homemade cheesecake flavor with a lot less fuss and a dash of playful presentation.

Ingredients You’ll Need
Every component in these No-Bake Strawberry Cheesecake Jars brings something special to the table, from the buttery crunch down below to the billowy clouds on top. Choosing quality ingredients lets each flavor and texture truly shine, creating a dessert that’s as delicious as it is delightful.
- Vanilla wafers: These cookies offer the perfect blend of sweetness and crunch for a classic, no-fuss cheesecake crust.
- Unsalted butter (melted): Melted butter binds your cookie crumbs, making your crust just rich and cohesive enough without overwhelming the flavors.
- Mason jars (8, 8-ounce size): These jars are the ideal vessel, creating those irresistible dessert layers and making serving a breeze.
- Reduced-fat cream cheese (softened): It gives your cheesecake filling its creamy tang while keeping things a bit lighter.
- Plain Greek yogurt: Adds a lovely tartness and creaminess, making each bite smooth and satisfying.
- Granulated sugar: Just enough sweetness to balance the tang from the cream cheese and yogurt.
- Vanilla extract: A splash of vanilla rounds out all the flavors, making your cheesecake filling truly decadent.
- Lemon zest and juice: Brightens up the filling with a fresh, zesty undertone that complements the strawberries perfectly.
- Whipped topping: Folded in for extra lightness and a dreamy, fluffy texture that feels like a cloud in every spoonful.
- Fresh strawberries (hulled and quartered): Star of the show! Juicy, vibrant, and sweet, strawberries give each jar a sunny burst of color and flavor.
How to Make No-Bake Strawberry Cheesecake Jars
Step 1: Blitz the Crumbs
Start by adding your vanilla wafers to a food processor and pulse them until you have fine crumbs. This is essential for achieving that classic cheesecake base—think velvety yet crunchy, ready to soak up the buttery goodness coming its way.
Step 2: Mix in the Butter
Pour the melted butter right into your crumb mix and process for a few seconds. You’ll see the crumbs begin to clump and take on a shiny, golden look. This is when you know they’re perfect for pressing into jars.
Step 3: Fill Your Jars with Crust
Spoon about 2 tablespoons of your buttery crumb mixture into the bottom of each mason jar. Press it down gently—a firm base, but not too packed. Pop the jars in the fridge while you whip up your cheesecake filling.
Step 4: Whip the Cheesecake Cream
In a mixing bowl, combine softened cream cheese, Greek yogurt, and sugar. Use a hand mixer on high speed until the mixture is silky-smooth. Then, add in the vanilla, lemon zest, and lemon juice. Another quick beat ensures all that citrusy goodness blends right in.
Step 5: Make the Filling Fluffy
Gently fold whipped topping into the cream cheese blend—a must for that satisfyingly fluffy texture—and then fold in about 1 cup of the strawberries. Your cheesecake filling will be luscious with hints of fruit in every spoonful!
Step 6: Layer the Goodness
Retrieve your jars and spoon 2–3 tablespoons of cheesecake filling over the crumb crust. Add a layer of strawberries, divide the rest of the filling among the jars, and finish with another layer of strawberries. Those layers? Not only pretty, but the flavors meld together beautifully.
Step 7: Chill and Serve
Seal the jars with lids and pop them in the fridge for at least 1–2 hours (or overnight, if you can wait!). The chilling melds everything together and gives you that iconic cheesecake texture—cool, creamy, and utterly satisfying.
How to Serve No-Bake Strawberry Cheesecake Jars
Garnishes
Just before serving, take these No-Bake Strawberry Cheesecake Jars up a notch with a few thoughtful garnishes. Try a dollop of whipped cream, a sprig of fresh mint, or extra lemon zest for a burst of color and fragrance. Even a drizzle of strawberry sauce or a couple of candied lemon peels can add a gourmet finishing touch!
Side Dishes
Pair your jars with light, fresh sides to balance the creaminess. A crisp fruit salad, sparkling lemonade, or even delicate shortbread cookies make lovely companions. If you’re feeling fancy, set out a platter of berries for guests to scoop on top.
Creative Ways to Present
Let your imagination run wild! Serve the No-Bake Strawberry Cheesecake Jars nestled in a vintage crate for a picnic vibe, scatter them on a cake stand for an eye-catching dessert table, or tie ribbons around the jars for a charming party favor. For mini versions, use smaller jars or even shot glasses for a bite-sized treat.
Make Ahead and Storage
Storing Leftovers
Cover each jar tightly with a lid and refrigerate them for up to 3 days. The layers stay fresh and delicious, which means you can sneak a jar whenever a cheesecake craving hits. It’s dessert meal-prep at its finest!
Freezing
Yes, you can freeze these No-Bake Strawberry Cheesecake Jars! Just seal tightly and freeze for up to a month. Thaw in the fridge overnight before enjoying—they’ll be slightly firmer, but all the flavor (and fun) remains.
Reheating
There’s no need to reheat since these jars are meant to be enjoyed chilled. Just grab one straight from the fridge and savor the cool, creamy texture that makes them so irresistible.
FAQs
Can I use other fruits in these No-Bake Strawberry Cheesecake Jars?
Absolutely! Feel free to swap or combine berries like blueberries, raspberries, or blackberries. Stone fruits such as peaches work beautifully too. Adjust sweetness if your fruit is extra tart.
What’s the best way to make these jars ahead for a party?
Prepare the jars (without garnishes) up to 24 hours in advance, seal tightly, and refrigerate. Add your garnishes just before serving for peak freshness and maximum flair.
Can I use full-fat cream cheese or regular whipped cream?
Yes! Full-fat cream cheese will make the filling even richer, and standard whipped cream works if you prefer. Just keep the ratio the same for that perfect texture.
What if I don’t have a food processor?
No worries. Place the vanilla wafers in a zip-top bag and crush them with a rolling pin until fine. The texture will be a bit more rustic, but still delicious!
Are No-Bake Strawberry Cheesecake Jars gluten-free?
If you use gluten-free vanilla wafers, these jars are easily made gluten-free without any compromise on flavor or texture.
Final Thoughts
There’s something magical about dessert in a jar, and these No-Bake Strawberry Cheesecake Jars are as fun to make as they are to eat. I hope you let yourself indulge in this sweet, simple treat and share it with friends or family—trust me, everyone will be asking for the recipe!
PrintNo-Bake Strawberry Cheesecake Jars Recipe

Indulge in the delightful flavors of this no-bake strawberry cheesecake served in individual jars for a charming presentation. Creamy, tangy, and bursting with fresh strawberries, this dessert is a perfect treat.
- Prep Time: 20 minutes
- Cook Time: 0 minutes
- Total Time: 1-2 hours
- Yield: 8 jars 1x
- Category: Dessert
- Method: No-Bake
- Cuisine: American
- Diet: Vegetarian
Ingredients
Cheesecake Base:
- 8 ounce package high-quality vanilla wafers
- 3 tablespoons unsalted butter, melted
Cheesecake Filling:
- 8 ounces reduced-fat cream cheese, softened
- ½ cup plain Greek yogurt
- ¼ cup granulated sugar
- 1/2 teaspoon vanilla extract
- zest of 1 lemon
- 1 teaspoon lemon juice
- 1 ½ cups high-quality whipped topping
- 4 cups hulled and quartered strawberries, divided
Instructions
- Prepare the Cheesecake Base: Process vanilla wafers in a food processor until fine crumbs form. Add melted butter and process until the mixture is clumpy.
- Layer the Jars: Distribute crumb mixture into mason jars and press down slightly. Chill in the refrigerator.
- Make the Cheesecake Filling: In a bowl, beat cream cheese, Greek yogurt, and sugar until smooth. Add vanilla, lemon zest, and juice. Fold in whipped topping and strawberries.
- Assemble the Jars: Spoon cheesecake filling into jars, layer with strawberries, and repeat. Chill for 1-2 hours or overnight.
Nutrition
- Serving Size: 1 jar
- Calories: 290
- Sugar: 19g
- Sodium: 210mg
- Fat: 17g
- Saturated Fat: 9g
- Unsaturated Fat: 6g
- Trans Fat: 0g
- Carbohydrates: 29g
- Fiber: 2g
- Protein: 5g
- Cholesterol: 40mg
Keywords: Strawberry Cheesecake, No-Bake Dessert, Individual Servings, Easy Recipe