
Chewy Peanut Butter Cookies Recipe
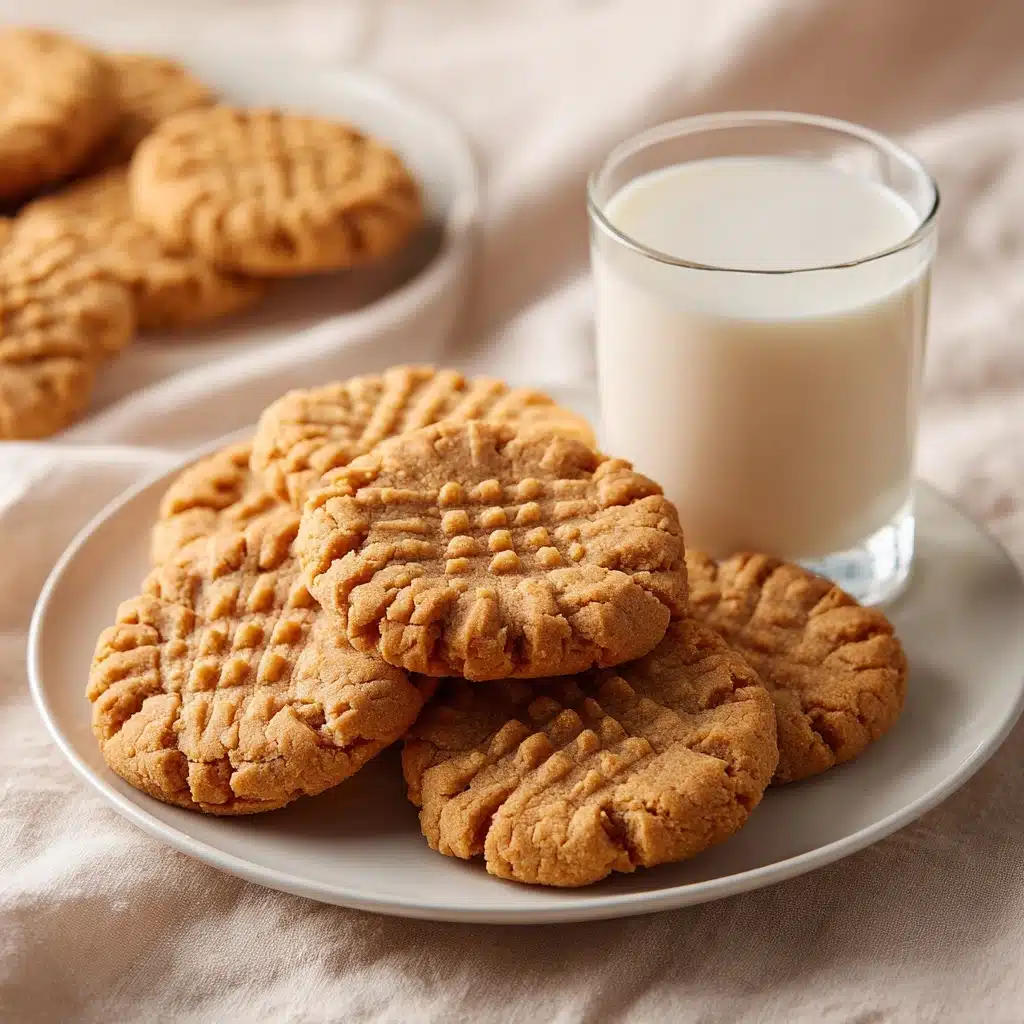
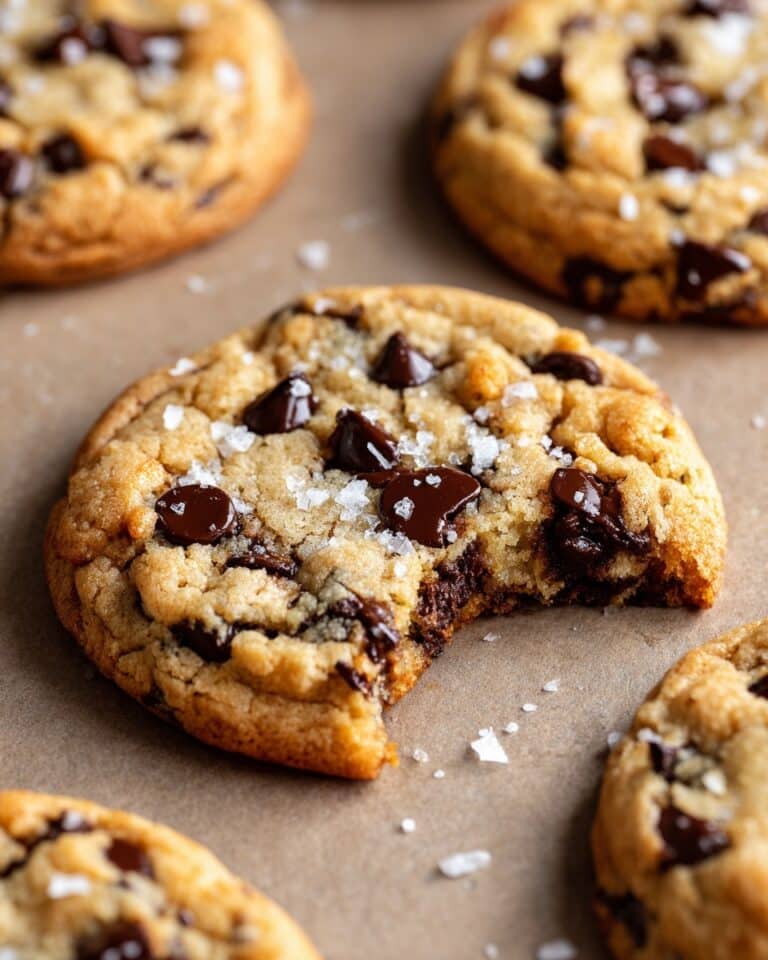
If you’re hunting for the kind of Chewy Peanut Butter Cookies that disappear instantly when set on the table, you’re in the right place. These cookies strike the perfect balance: crisp, golden edges with a tender, plush center that melts in your mouth and is packed with rich, nutty flavor. Each bite delivers pure peanut buttery bliss, studded with roasted peanuts or melty chocolate chips. Whether you’re making them for a special occasion or just to treat yourself, these cookies are certain to become a new staple in your baking repertoire.

Ingredients You’ll Need
Making a batch of these Chewy Peanut Butter Cookies is wonderfully straightforward, but each ingredient plays its own essential role in creating that irresistible texture and flavor. Here’s the lineup and why each one matters:
- Creamy peanut butter: Choose a processed brand (like Jif or Skippy) for the best chewy texture and cohesive dough.
- Unsalted butter, softened: Adds richness and creates the fluffy, tender crumb you crave in a perfect cookie.
- Packed light brown sugar: Contributes that signature chewiness and a subtle molasses flavor.
- Granulated sugar: Balances the brown sugar for sweetness and encourages golden, crisp edges.
- Large eggs: Two eggs provide structure and keep these cookies soft and moist.
- Vanilla extract: Rounds out the flavors and deepens the aroma.
- All-purpose flour: Gives structure without making the cookies dry or cakey.
- Baking soda: Ensures just the right lift so your cookies are thick and not flat.
- Salt: A pinch is all it takes to balance the sweetness and enhance the peanut butter flavor.
- Chopped roasted peanuts or chocolate chips: For pops of crunch or melty goodness—choose your adventure!
How to Make Chewy Peanut Butter Cookies
Step 1: Cream Butter, Peanut Butter, and Sugars
Start by beating the softened butter together with the creamy peanut butter, brown sugar, and granulated sugar. Use a hand or stand mixer on medium speed for 2 to 3 minutes until the mixture is smooth, lighter in color, and fluffy. This step is crucial for aerating the dough, allowing those Chewy Peanut Butter Cookies to have their soft bite.
Step 2: Add Eggs and Vanilla
Add the eggs one at a time, mixing well after each egg to ensure the dough stays smooth and uniform. Pour in the vanilla extract next, scraping down the sides and bottom of the bowl with a spatula. This attention to detail ensures every bite tastes as amazing as the last.
Step 3: Mix in Dry Ingredients
In a separate bowl, whisk together the flour, baking soda, and salt to evenly disperse the leavening agent and salt throughout. Slowly add this dry mix to the wet ingredients, mixing just until a dough forms. Don’t overdo it—just a few turns of the mixer or spatula are plenty to keep your Chewy Peanut Butter Cookies soft, not tough.
Step 4: Chill the Dough (Optional but Recommended)
Though not strictly necessary, chilling the dough for at least 30 minutes (or up to three days in the refrigerator) helps the cookies hold their shape and enhances the flavor. If you have the time, this small step gives your cookies those dreamy, thick, and chewy centers.
Step 5: Scoop and Flatten
Preheat your oven to 350°F (175°C) while lining your baking sheets with parchment paper or silicone baking mats. Scoop out rounded tablespoons (about 1.5 tbsp each), and roll into balls. Place them on the baking sheet, leaving space between each. If you love the classic look, press each one gently with a fork in a crisscross pattern, or just use your palm for a more rustic style.
Step 6: Bake the Cookies
Pop those trays into the oven and bake for 9 to 11 minutes. Remove them when the edges are just set and the centers still look soft and slightly underbaked—they’ll continue to finish as they rest on the sheet, ensuring the irresistibly chewy texture we’re after.
Step 7: Cool Before Serving
Let the Chewy Peanut Butter Cookies rest on the sheet for at least 5 minutes before transferring to a wire rack. This brief wait allows them to finish setting and prevents them from breaking apart, so you get perfectly chewy cookies every time.
How to Serve Chewy Peanut Butter Cookies
Garnishes
A light sprinkle of flaky sea salt on each warm cookie adds a lovely contrast to the sweetness and really amps up the nutty notes. You can also drizzle melted chocolate or a dusting of powdered sugar for extra flair and decadence.
Side Dishes
Few things pair as beautifully with Chewy Peanut Butter Cookies as an ice-cold glass of milk (dairy or non-dairy, your call), but don’t overlook the joy of serving them alongside coffee, hot cocoa, or even a scoop of vanilla or chocolate ice cream for a next-level dessert.
Creative Ways to Present
Turn these cookies into the ultimate ice cream sandwiches, stack them in mason jars for gifting, or arrange them in a basket with a ribbon for a thoughtful homemade present. You could also serve assorted platters with chocolate chip or oatmeal cookies for a fun variety at your next gathering.
Make Ahead and Storage
Storing Leftovers
Keep any leftover Chewy Peanut Butter Cookies in an airtight container at room temperature. They’ll stay soft and chewy for up to five days, ready to grab whenever you need a little pick-me-up.
Freezing
These cookies freeze beautifully, baked or unbaked. For baked cookies, place them in a single layer with parchment between stacks and freeze up to two months. If freezing dough, scoop into balls and freeze on a tray, then transfer to a bag—they can go straight from freezer to oven (just add a minute or two to baking time).
Reheating
A quick zap in the microwave (about 10-15 seconds) will bring back that freshly-baked warmth and softness. If you’re reheating from frozen, a few extra seconds will do the trick. For larger batches, pop them on a tray in a 300°F oven for 5 minutes.
FAQs
Can I use natural peanut butter for these cookies?
Natural peanut butter has more oil and can create a thinner, crumblier dough. For the best chewy texture, stick to processed brands like Jif or Skippy.
Can I make Chewy Peanut Butter Cookies gluten-free?
Yes! Swap the all-purpose flour for your favorite cup-for-cup gluten-free flour blend. The texture may vary slightly, but you’ll still get a delicious cookie.
What’s the key to making cookies extra chewy?
It’s all about the brown sugar and a slightly underbaked center. Taking the cookies out while they’re still a bit soft guarantees that dreamy, chewy bite after they cool.
Should I chill the dough if I’m in a hurry?
While you can skip chilling if pressed for time, a short 30-minute rest in the fridge helps the flavors develop and ensures the cookies don’t spread too much in the oven.
Can I double this recipe for a crowd?
Absolutely! This recipe scales up beautifully—just be sure to use a large enough mixing bowl and watch your bake times, as overcrowding the oven can affect cookie texture.
Final Thoughts
There’s something almost magical about Chewy Peanut Butter Cookies—one bite and you’ll see why they’re such a time-honored classic. Whether you’re baking for friends, family, or simply yourself (no judgment!), I promise this recipe will win you cookie hero status every single time. Go ahead, gather those ingredients, and enjoy sharing (or keeping!) every last chewy, peanutty bite.
PrintChewy Peanut Butter Cookies Recipe

These Chewy Peanut Butter Cookies are the perfect combination of sweet, salty, and nutty flavors. With a soft, chewy texture and a slight crunch from the chopped peanuts or chocolate chips, these cookies are sure to be a hit with peanut butter lovers.
- Prep Time: 20 minutes
- Cook Time: 10 minutes
- Total Time: 30 minutes
- Yield: Makes about 24 cookies 1x
- Category: Dessert
- Method: Baking
- Cuisine: American
- Diet: Vegetarian
Ingredients
For the Cookie Dough:
- 1 cup creamy peanut butter (processed brands like Jif or Skippy work best)
- 1/2 cup unsalted butter, softened
- 1 cup packed light brown sugar
- 1/2 cup granulated sugar
- 2 large eggs
- 1 teaspoon vanilla extract
- 1 1/2 cups all-purpose flour
- 1/2 teaspoon baking soda
- 1/4 teaspoon salt
- 1/2 cup chopped roasted peanuts or chocolate chips
Instructions
- Cream Butter, Peanut Butter, and Sugars: Use a hand or stand mixer to cream the softened butter and peanut butter with both sugars for 2–3 minutes until the mixture is smooth, fluffy, and lightened in color. This step ensures air is incorporated for that soft chew.
- Add Eggs and Vanilla: Add the eggs one at a time, beating after each addition. Then mix in the vanilla extract. Scrape the bowl with a spatula to ensure no streaks remain.
- Mix in Dry Ingredients: In a separate bowl, whisk together flour, baking soda, and salt. Gradually mix the dry ingredients into the wet, just until the dough forms. Don’t overmix or the cookies will toughen.
- Chill the Dough (Optional but Recommended): While optional, chilling helps the cookies retain shape and enhances flavor. Chill for 30 minutes or up to 3 days covered in the fridge.
- Scoop and Flatten: Preheat your oven to 350°F (175°C). Line baking sheets with parchment or silicone mats. Use a cookie scoop or tablespoon to form 1.5 tbsp dough balls. Flatten gently with your palm or a fork for classic criss-cross marks.
- Bake the Cookies: Bake for 9–11 minutes until the edges are set but centers still look soft. Remove them while slightly underbaked—they’ll finish cooking on the sheet.
- Cool Before Serving: Let the cookies rest on the tray for 5 minutes, then transfer to a wire rack. This prevents breakage and helps them set into chewy perfection.
Nutrition
- Serving Size: 1 cookie
- Calories: 180
- Sugar: 12g
- Sodium: 120mg
- Fat: 11g
- Saturated Fat: 4g
- Unsaturated Fat: 6g
- Trans Fat: 0g
- Carbohydrates: 18g
- Fiber: 1g
- Protein: 4g
- Cholesterol: 25mg
Keywords: Chewy Peanut Butter Cookies, Peanut Butter, Cookies, Dessert, Baking
