
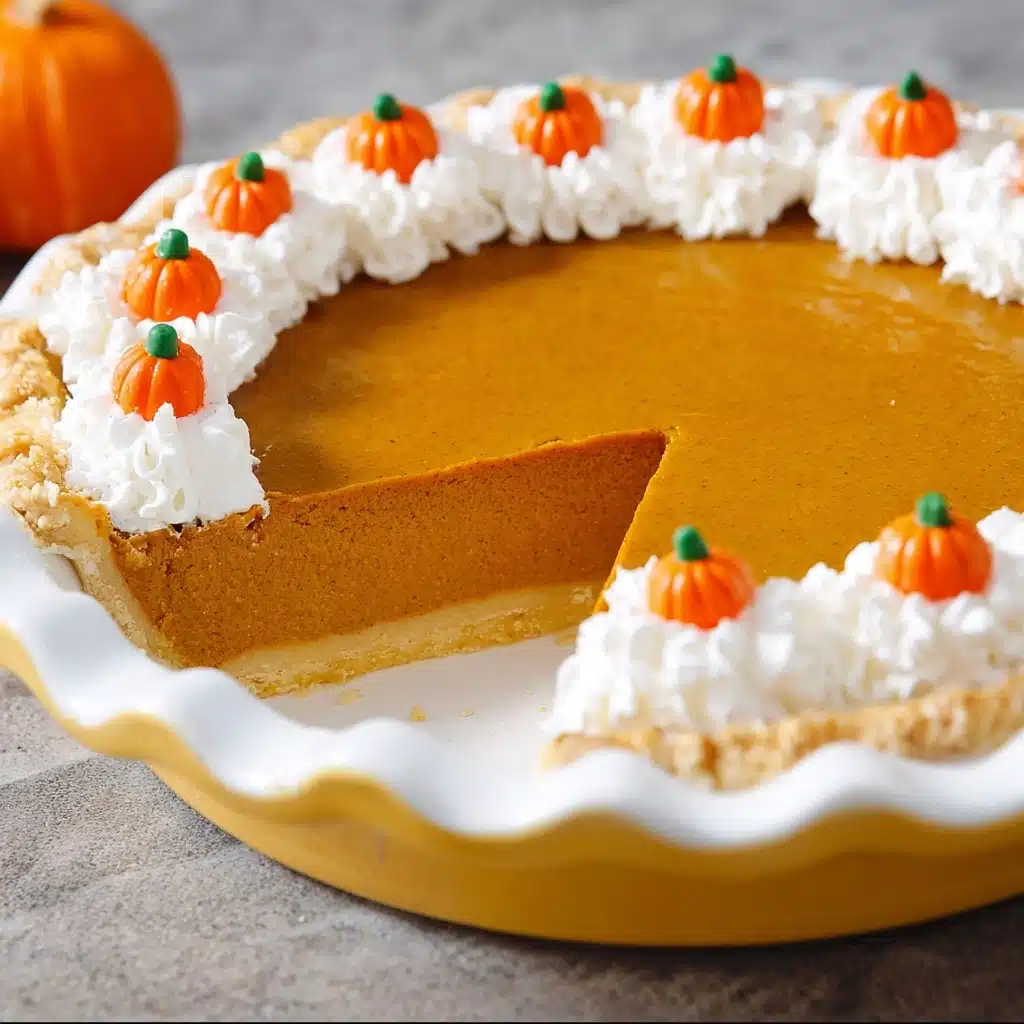
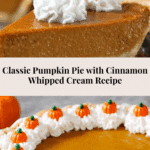
Classic Pumpkin Pie Recipe
If you’ve ever dreamed of nailing the perfect fall dessert, then this Classic Pumpkin Pie is your new best friend. It’s that warm, spiced, creamy dessert that fills your kitchen with the most inviting aromas while delivering on a flaky crust and luscious filling that keeps everyone asking for seconds. With every bite, this pie captures the essence of autumn, making it a timeless favorite for holiday gatherings or cozy nights in. Trust me, once you make this Classic Pumpkin Pie, it will become your go-to recipe year after year.

Ingredients You’ll Need
The beauty of this Classic Pumpkin Pie lies in its simple, authentic ingredients. Each component, from the buttery crust to the spiced pumpkin filling, plays a crucial role in creating a perfectly balanced flavor and texture that’ll impress every single time.
- 2 1/2 cups all-purpose flour: The foundation for a tender yet sturdy crust that holds all the delicious filling.
- 1 tablespoon sugar: Just enough sweetness to balance the flavors in the crust without overpowering it.
- 1/4 teaspoon cinnamon: Adds subtle warmth to the dough, hinting at the spices in the filling.
- 1/4 teaspoon sea salt: Enhances all the flavors and keeps the crust from tasting bland.
- 1 cup unsalted butter (diced into 1/4″ pieces): The secret to that flaky, melt-in-your-mouth crust.
- 6 tablespoons ice water: Keeps the dough cool and brings it together without toughness.
- 2 cups pumpkin purée: Use fresh from a sugar pumpkin or canned—this is the star of the filling, rich and creamy.
- 1/3 cup unsalted butter (melted): Adds richness and helps create a smooth texture in the filling.
- 1/2 cup brown sugar: Brings deep caramel notes that complement the pumpkin beautifully.
- 1/3 cup white sugar: Balances sweetness without making the pie overly sugary.
- 1/4 cup maple syrup: Gives a natural sweetness with a hint of autumn magic.
- 1 cup heavy cream: Adds silkiness and moisture for that classic creamy pumpkin pie consistency.
- 2 large eggs & 2 egg yolks: Bind the filling and add richness for an indulgent texture.
- 2 tablespoons all-purpose flour: Helps set the filling so it slices perfectly.
- 1 teaspoon pure vanilla extract: Lifts the flavors with a delicate sweetness and depth.
- 1 teaspoon ground cinnamon: A must-have spice giving warmth and character to the filling.
- 1/2 teaspoon ground nutmeg: Adds a pleasant, fragrant spice complexity.
- 1/4 teaspoon ground cloves: Offers subtle, spicy undertones that make the pie truly special.
- 1/4 teaspoon ground ginger: Freshens and brightens the traditional pumpkin spice blend.
- 1 large egg (beaten) & 1 tablespoon milk: For brushing the crust, ensuring a golden, shiny finish.
- 2 cups heavy whipping cream (cold): For the cinnamon whipped cream topping that takes this pie to the next level.
- 1/4 cup granulated sugar: Sweetens the whipped cream just right.
- 1 teaspoon vanilla extract & 1 teaspoon ground cinnamon: Perfectly infuse the whipped cream with cozy flavors.
- Candy pumpkins: Optional, but so fun and festive for garnishing!
How to Make Classic Pumpkin Pie
Step 1: Prepare the Pie Crust
Start by combining the flour, sugar, cinnamon, and salt in a food processor, pulsing a few times to mix them well. Then add your cold, diced butter and pulse until the mixture looks like coarse crumbs. Ice water is added gradually just until the dough clumps together—this step is crucial for a flaky crust, so don’t overdo the water. Once the dough holds together when you press it, form it into two disks, cover tightly in plastic wrap, and refrigerate for at least an hour. This chill time lets the dough relax and keeps your crust tender during baking.
Step 2: Make the Pumpkin Pie Filling
In a large bowl, beat the eggs and egg yolks with the brown sugar, white sugar, salt, and warm spices until smooth and well combined. Stir in the pumpkin purée, maple syrup, and melted butter, then add the heavy cream and vanilla extract. The flour mixed into the filling helps it set beautifully without any graininess. This filling is the heart of the Classic Pumpkin Pie, perfectly spiced and luxuriously smooth.
Step 3: Assemble the Pie
Roll out one chilled dough disk on a lightly floured surface to a 12-inch circle, then gently lift and fit it into a 9-inch pie dish. Press it evenly and trim any excess dough, creating a pretty fluted edge. Pour the pumpkin filling in and smooth the top. Brush the crust edges with the egg wash made from the beaten egg and milk to get that perfect golden finish as it bakes.
Step 4: Bake the Pie
Preheat your oven to 425 degrees Fahrenheit and bake the pie for 15 minutes. Then reduce the temperature to 350 degrees and bake for another 45 to 55 minutes. The pie is perfectly done when the center is just slightly jiggly but not liquid—test it with a knife tip. Once out of the oven, place the pie on a cooling rack and allow it to come to room temperature before serving. This resting time is key for clean slices and for the filling to set completely.
Step 5: Make the Cinnamon Whipped Cream
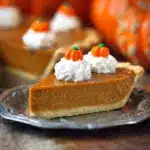
Whip together the cold heavy cream with sugar, vanilla, and cinnamon until soft peaks form. This creamy, spiced topping brings a light and fluffy contrast to the rich pumpkin filling. Using a pastry bag fitted with a star tip, pipe the whipped cream onto slices just before serving and garnish with candy pumpkins for that whimsical fall touch.
How to Serve Classic Pumpkin Pie
Garnishes
The perfect garnish can turn your Classic Pumpkin Pie from delicious to downright irresistible. A generous swirl of cinnamon whipped cream adds creaminess and a gentle spice touch that pairs beautifully with the pie’s warm flavors. For a playful and festive finish, scatter some candy pumpkins across the top to bring color and charm to your presentation.
Side Dishes
Classic Pumpkin Pie is often the grand finale to a hearty meal, but it pairs wonderfully with warm beverages like spiced cider or a cup of freshly brewed coffee. If you want to keep it light, serve with a simple salad or roasted nuts on the side. For richer dinners, a scoop of vanilla ice cream or a dollop of whipped cream-infused coffee is an excellent complement.
Creative Ways to Present
Thinking beyond the traditional slice? Try individual mini pumpkin pies using muffin tins for a fun twist at parties. Or dust the surface lightly with powdered sugar and a cinnamon stick on the side for an elegant touch. You can also add decorative dough leaves cut from the second pie dough disk to place around the crust before baking—that’s sure to impress your guests with your crafty flair.
Make Ahead and Storage
Storing Leftovers
If you have any leftover Classic Pumpkin Pie, wrap it tightly with plastic wrap or store in an airtight container and refrigerate. It will keep its best flavor and texture for up to 4 days. The flavors actually mellow and deepen after a day or two, making leftovers just as wonderful as fresh-out-of-the-oven slices.
Freezing
Classic Pumpkin Pie freezes wonderfully if you want to prepare well in advance. Freeze the pie whole or in individual slices wrapped securely in plastic wrap and aluminum foil to prevent freezer burn. When stored properly, it can keep for up to 2 months—perfect for getting ahead before busy holiday celebrations.
Reheating
When you’re ready to serve frozen or refrigerated pie, let it thaw overnight in the fridge. To refresh the texture and warmth, reheat slices in a low oven at 300 degrees Fahrenheit for about 10-15 minutes—just enough to warm through without drying out the filling. Avoid microwaving to keep the crust crispy and prevent any goopy filling.
FAQs
Can I use canned pumpkin instead of fresh pumpkin purée?
Absolutely! Canned pumpkin purée is perfectly fine and saves time. Just make sure to use pure pumpkin and not pumpkin pie filling, which contains added spices and sweeteners.
How do I prevent a soggy pie crust?
Chilling the dough and using ice water helps keep the crust flaky, but also pre-baking the crust for a few minutes before adding the filling can help. Brushing the crust edges with egg wash and baking immediately prevents sogginess too.
Can I make this pie vegan or dairy-free?
While this Classic Pumpkin Pie relies on butter, cream, and eggs, you can substitute dairy-free butter and plant-based cream alternatives, and use flax eggs or other egg replacers to veganize the recipe—but expect subtle differences in texture and flavor.
Why is my pumpkin pie cracking on top?
Cracks usually happen when the pie is overbaked or the oven temperature is too high. Baking the pie gently and avoiding overcooking keeps it smooth and creamy.
What’s the best way to roll out the pie dough?
Lightly flour your surface and rolling pin, working from the center outward, rotating the dough frequently to maintain a uniform thickness. Keeping the dough cold and not overworking it ensures a tender crust.
Final Thoughts
There’s truly nothing like biting into a slice of homemade Classic Pumpkin Pie with its perfect balance of spice, sweetness, and creamy texture wrapped in a flaky crust. It’s a recipe that’s special enough for celebrations but simple enough to enjoy any time the craving strikes. I hope this recipe inspires you to create your own cozy memories around this timeless dessert—you deserve every delicious bite!
PrintClassic Pumpkin Pie Recipe
This Classic Pumpkin Pie recipe offers a rich, creamy spiced pumpkin filling nestled in a buttery, flaky homemade crust. Enhanced with warm spices and a velvety cinnamon whipped cream topping, it’s a perfect holiday dessert that captures traditional fall flavors.
- Prep Time: 30 minutes
- Cook Time: 1 hour 10 minutes
- Total Time: 1 hour 40 minutes
- Yield: 8 servings 1x
- Category: Dessert
- Method: Baking
- Cuisine: American
- Diet: Vegetarian
Ingredients
Pie Crust
- 2 1/2 cups all-purpose flour
- 1 tablespoon sugar
- 1/4 teaspoon cinnamon
- 1/4 teaspoon sea salt
- 1 cup unsalted butter, diced into 1/4” pieces
- 6 tablespoons ice water
Filling
- 2 cups pumpkin purée (from a sugar pumpkin OR 1 15-ounce can)
- 1/3 cup unsalted butter, melted
- 1/2 cup brown sugar
- 1/3 cup white sugar
- 1/4 cup maple syrup
- 1 cup heavy cream
- 2 large eggs
- 2 egg yolks
- 2 tablespoons all-purpose flour
- 1 teaspoon pure vanilla extract
- 1 teaspoon ground cinnamon
- 1/2 teaspoon ground nutmeg
- 1/4 teaspoon ground cloves
- 1/4 teaspoon ground ginger
Egg Wash
- 1 large egg, beaten
- 1 tablespoon milk
Cinnamon Whipped Cream
- 2 cups heavy whipping cream, cold
- 1/4 cup granulated sugar
- 1 teaspoon vanilla extract
- 1 teaspoon ground cinnamon
Garnish
- Candy pumpkins
Instructions
- Prepare the Pie Crust: In a food processor, pulse the flour, sugar, cinnamon, and sea salt a few times until combined.
- Add Butter: Add the cold diced butter and pulse until mixture resembles coarse crumbs, looking dry but crumbly.
- Add Ice Water: Gradually add ice water while pulsing until dough forms small moist clumps and sticks when pressed. Add water one teaspoon at a time if needed, avoiding stickiness.
- Chill Dough: Shape dough into a ball, divide into two, form disks, wrap in plastic, and refrigerate for 1 hour.
- Make the Filling: Beat eggs and egg yolks in a large bowl. Mix in brown sugar, white sugar, salt, cinnamon, ginger, nutmeg, cloves, and flour until smooth.
- Add Pumpkin Purée: Stir in pumpkin purée, maple syrup, and melted butter until well combined.
- Add Cream: Pour in the heavy cream and mix thoroughly to combine all filling ingredients.
- Roll Dough: On a floured surface, roll out one dough disk into a 12-inch circle. Reserve the second disk for another use or decoration.
- Fit Dough into Pie Dish: Carefully place rolled dough into a 9×2-inch pie dish, pressing gently to fit and trimming excess dough. Flute edges decoratively.
- Fill Pie Crust: Pour and spread the pumpkin filling evenly into the crust. Brush crust edges with egg wash made from beaten egg and milk.
- Preheat Oven: Heat oven to 425°F (220°C).
- Bake at High Temp: Bake the pie for 15 minutes at 425°F to set the crust edges.
- Bake at Lower Temp: Reduce oven to 350°F (175°C) and bake 45 to 55 minutes more or until a knife inserted near the center comes out mostly clean with a slightly wet center. The pie should be lightly jiggly in the middle.
- Cool Pie: Transfer pie to a cooling rack and let it cool to room temperature, about 1 hour before serving.
- Make Cinnamon Whipped Cream: Combine cold heavy cream, sugar, vanilla extract, and ground cinnamon in a large bowl.
- Whip Cream: Using a hand or stand mixer, whip cream starting at slow-medium speed, increasing to high, until soft peaks form that hold shape.
- Pipe Whipped Cream: Fill a pastry bag fitted with a star tip with the whipped cream and pipe onto pie just before serving.
- Garnish: Decorate the top with candy pumpkins for a festive finishing touch.
Notes
- Use a sugar pumpkin for fresh pumpkin purée if possible; canned pumpkin purée works well as a convenient alternative.
- Ensure butter and ice water are very cold for a flaky crust.
- Do not overwork the dough to keep it tender and flaky.
- The pie is best served after it has cooled completely to set the filling properly.
- Use a sharp knife to test doneness; the center should jiggle slightly but not be liquid.
- The remaining dough disk can be used to create decorative shapes for the pie top or baked separately as cookies.
- Whipped cream can be made ahead and refrigerated, but pipe just before serving for best presentation.
Nutrition
- Serving Size: 1 slice (1/8 of pie)
- Calories: 370
- Sugar: 28g
- Sodium: 210mg
- Fat: 23g
- Saturated Fat: 14g
- Unsaturated Fat: 7g
- Trans Fat: 0.3g
- Carbohydrates: 36g
- Fiber: 3g
- Protein: 5g
- Cholesterol: 110mg
Keywords: pumpkin pie, classic pumpkin pie, holiday dessert, Thanksgiving pie, pumpkin dessert, homemade pie crust