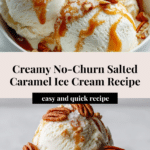
Creamy No-Churn Salted Caramel Ice Cream Recipe

This Creamy No-Churn Salted Caramel Ice Cream recipe offers a rich and indulgent frozen treat that combines the buttery sweetness of homemade salted caramel with smooth, fluffy ice cream, all made easily without an ice cream maker. Its marbled caramel ribbons add texture and flavor, making it a perfect dessert for any occasion.
- Prep Time: 15 minutes
- Cook Time: 10 minutes
- Total Time: 6 hours 25 minutes
- Yield: 8 servings 1x
- Category: Dessert
- Method: No-Cook
- Cuisine: American
Ingredients
Scale
Caramel Sauce
- 1 cup (200 g) granulated sugar
- 1/4 cup (60 ml) water
- 2 tablespoons (28 g) unsalted butter
- 1 teaspoon sea salt flakes
- Optional: 2 tablespoons (25 g) brown sugar
- Optional: 1 tablespoon (15 ml) light corn syrup
Ice Cream Base
- 2 cups (480 ml) heavy whipping cream, chilled
- 1 can (14 oz / 396 g) sweetened condensed milk
- 1 teaspoon vanilla extract
Instructions
- Make the caramel sauce: In a heavy saucepan over medium heat, combine 1 cup granulated sugar and 1/4 cup water. Stir gently until the sugar dissolves, then stop stirring. Let the mixture simmer, swirling the pan occasionally, until it turns a deep amber color, about 8-10 minutes. This caramelization gives the sauce its rich flavor.
- Add butter and salt: Remove the saucepan from heat and immediately stir in 2 tablespoons unsalted butter and 1 teaspoon sea salt flakes. Stir until the mixture is smooth. Set aside to cool slightly while you prepare the ice cream base.
- Whip the cream: In a large chilled bowl, use an electric mixer on medium-high speed to beat 2 cups heavy whipping cream until stiff peaks form, approximately 3-4 minutes. This aerates the cream to create the ice cream’s creamy texture.
- Mix condensed milk and vanilla: In a separate bowl, combine 1 can sweetened condensed milk with 1 teaspoon vanilla extract. This mixture adds sweetness and flavor to the ice cream base.
- Fold ingredients together: Gently fold the condensed milk mixture into the whipped cream until fully combined without deflating the whipped cream. Then pour half of the cooled caramel sauce into the mixture and lightly swirl it for a marbled effect. Reserve the remaining caramel for layering.
- Layer the ice cream: Pour half of the ice cream mixture into a loaf pan or airtight container. Drizzle some of the reserved caramel sauce over it. Add the remaining ice cream base on top and swirl the rest of the caramel on the surface using a knife or skewer to create caramel ribbons.
- Freeze: Cover the container tightly and freeze for at least 6 hours or overnight until firm. This allows the ice cream to set without an ice cream maker.
- Serve: Remove the ice cream from the freezer 5-10 minutes before serving to soften slightly for easy scooping. Scoop and enjoy your creamy salted caramel ice cream.
Notes
- You can add brown sugar or light corn syrup to the caramel to create a different flavor and texture if desired.
- Make sure the whipped cream forms stiff peaks to achieve the best creamy texture.
- Use a chilled bowl and beaters to help the cream whip more efficiently.
- For an even stronger salted caramel flavor, sprinkle a pinch of sea salt on top just before serving.
- This recipe does not require an ice cream maker, making it accessible and simple.
Keywords: No-churn ice cream, Salted caramel ice cream, Homemade ice cream, Easy dessert, No ice cream maker recipe